Redshift

Connector Details
| Connector Attributes | Details |
|---|---|
| Name | Redshift |
| Description | Amazon Redshift is a fully managed, cloud-based data warehouse service designed for large-scale data storage and analytics. It enables organizations to efficiently store, process, and analyze vast amounts of structured and semi-structured data using SQL-based queries. Redshift is built on a massively parallel processing (MPP) architecture, allowing for high-performance querying and analytics across petabyte-scale datasets. |
| Connector Type | Class C |
Features
| Feature Name | Feature Details |
|---|---|
| Load Strategies | Full Load |
| Metadata Extraction | Supported |
| Data Acquisition | Supported |
| Data Publishing | Not Supported |
| Automated Schema Drift Handling | Not Supported |
Source Connection Attributes
Connection Parameters | Data Type | Example |
|---|---|---|
Connection Name | String | Redhsift |
User | String | <DB User Name> |
Password | String | <DB Password> |
Database | String | <Database Name> |
Server | String | redshift-cluster-xxxxxx-xxx.xxxxxxxx.xx-xxxx-x.redshift.amazonaws.com |
Port | Integer | 5439 |
Silver Schema (Optional) | String | |
Bronze Schema (Optional) | String |
Connector Specific Configuration Details
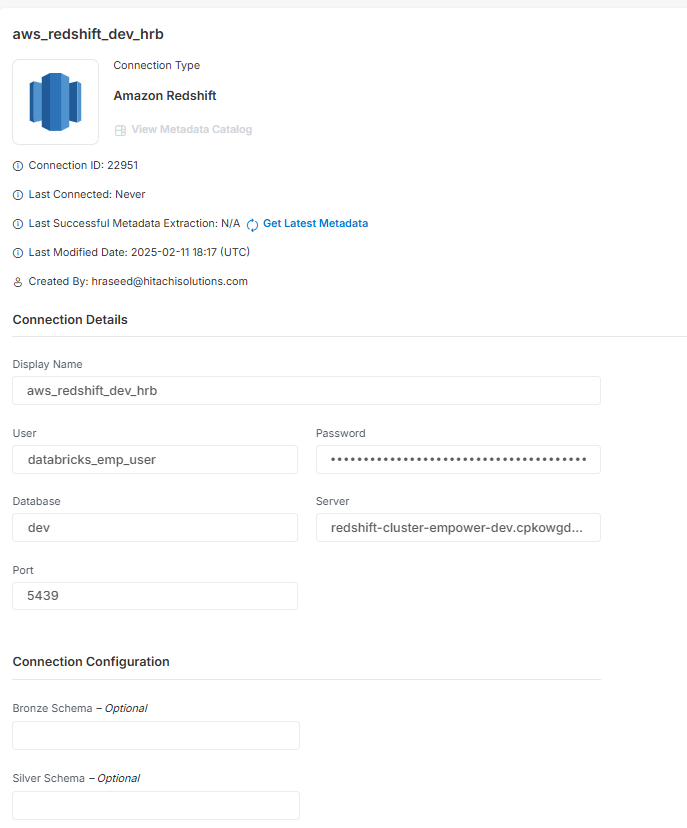
The connector demands a few mandatory options: Server, Database, User and Password.
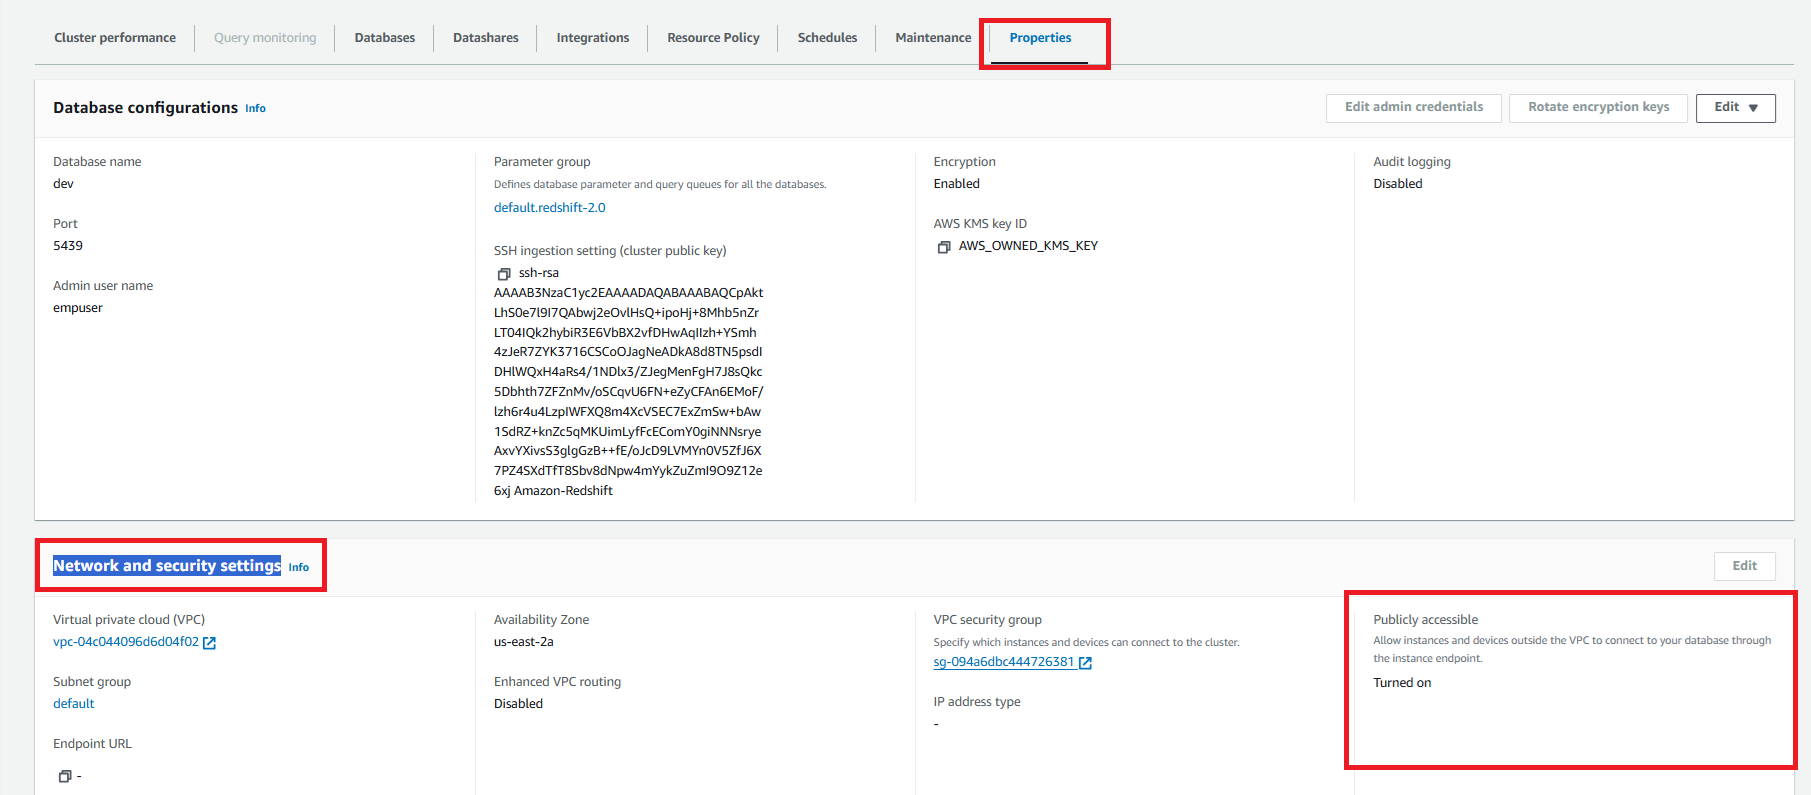
You can get the Server Name from the below Cluster information page from AWS Redshift service.

Redshift Connector Configuration
To establish a secure connection between Amazon Redshift and the Empower platform, you need to create a dedicated user and grant appropriate privileges. The following SQL commands help in setting up the necessary access controls for the Redshift connector.
User Creation
The first step is to create a new user in Redshift specifically for the Databricks Empower product. This user will be used to authenticate and interact with the database.
CREATE USER user_name PASSWORD 'xxxxx';
This command creates a new user named user_name with the specified password. Ensure that the password follows the security policies defined by your organization.
Granting Schema Usage Permissions
The user needs permission to access schemas within the Redshift database. The following command grants usage rights on the public schema:
GRANT USAGE ON SCHEMA public TO user_name;
This ensures that the user can explore the schema and access objects within it.
Granting Read Access to System Tables
To allow the user to retrieve metadata and query system catalog tables, grant SELECT permission on all tables within the pg_catalog schema:
GRANT SELECT ON ALL TABLES IN SCHEMA pg_catalog TO databricks_emp_user_01;
This enables the user to access system tables, which may be required for metadata extraction and analysis.
Screenshot To Use Connector

Configuring AWS Redshift for Databricks Connectivity
Step 1: Enable Public Access for Redshift
- Navigate to the AWS Redshift console.
- Select the Redshift cluster you want to configure.
- Go to the Properties tab.
- Scroll down to Network and Security settings.
- Locate the Publicly accessible field and ensure it is set to Turned on.
- If it's disabled, click Edit, enable it, and save the changes.
- Ensure that an appropriate security group is assigned to manage inbound connections.

Step 2: Add Databricks Workspace IP to Security Group
- Go to the EC2 Dashboard in AWS.
- Navigate to Security Groups.
- Identify the security group associated with the Redshift cluster. This is listed under the VPC Security Group in the Properties tab of Redshift.
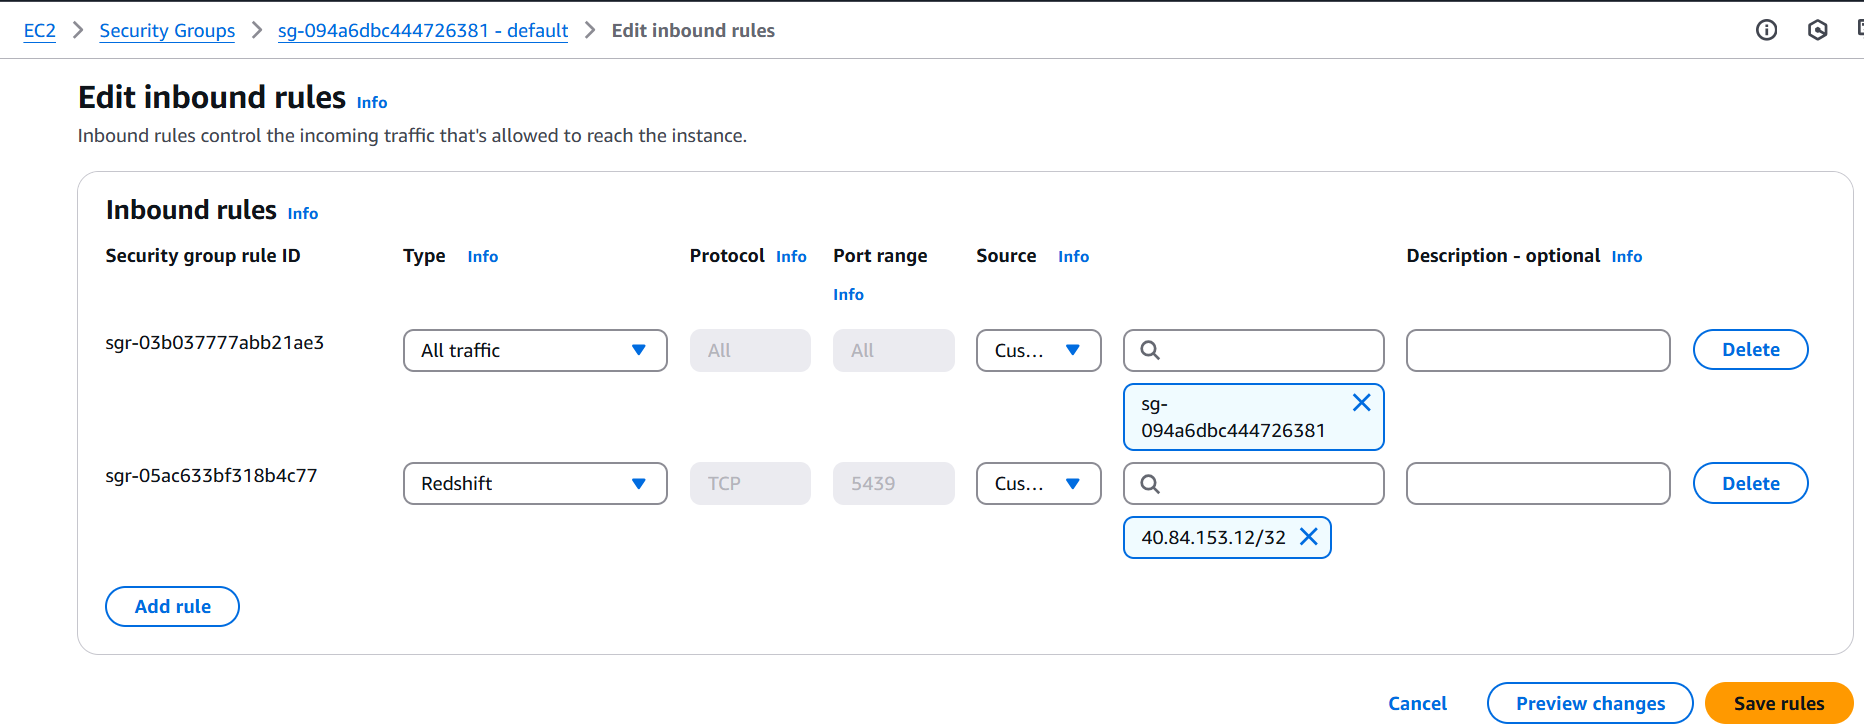
- Click on the security group and go to the Inbound rules section.
- Click Edit inbound rules and add a new rule:
- Type: Redshift
- Protocol: TCP
- Source: Custom
- IP Address: Enter the public IP address of your Databricks workspace.
- Save the inbound rule changes.

By following these steps, you will successfully configure AWS Redshift to allow secure connectivity from your Databricks workspace.
Updated 4 months ago
