Extend
Extend Empower Workflows with the orchestration of external services.
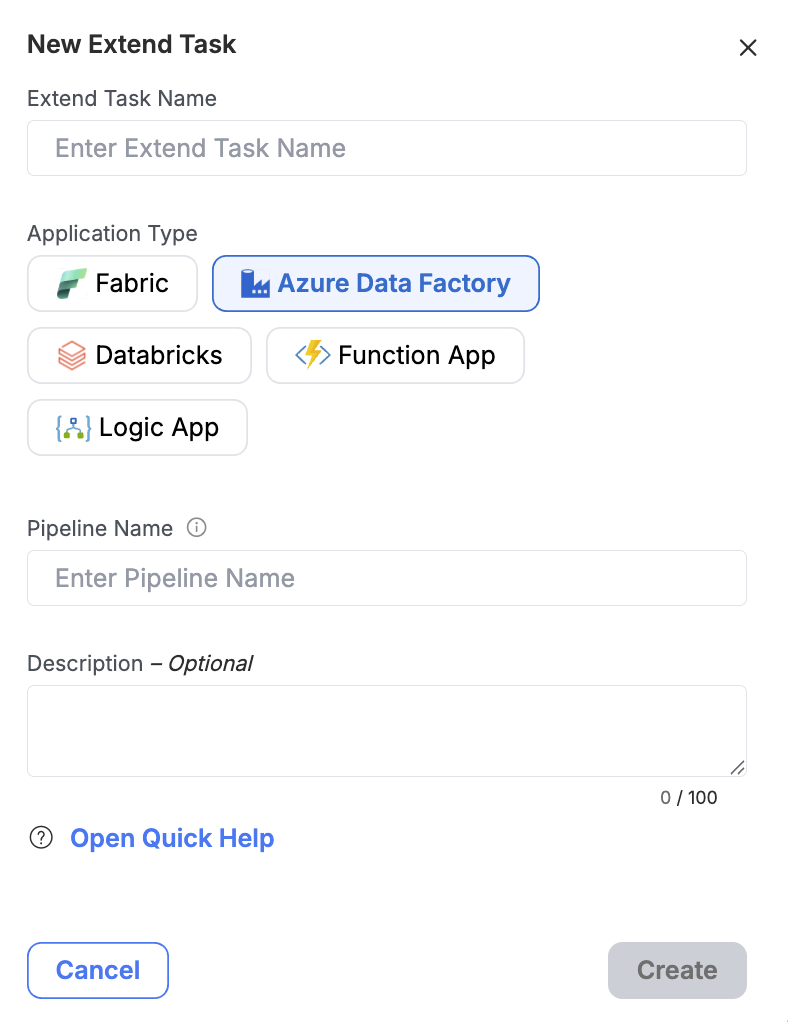
Extend Tasks are designed to give you flexibility beyond standard data movement Tasks of Aquire, Transform, and Publish. They allow you to orchestrate external services and custom processes - such as Azure Data Factory pipelines, Databricks notebooks, Fabric pipelines, Logic Apps, and Azure Functions - directly within Empower. This means you can mix and match different technologies to create tailored Workflows that meet your unique business needs.
Why Use Extend Tasks?
Modern data solutions often require more than simple ingestion and transformation. Extend Tasks enable you to:
- Integrate seamlessly with external tools and services without leaving the Empower environment.
- Avoid writing custom integration code - connections to multiple services are handled for you.
- Automate more complex workflows by chaining Tasks together for end-to-end orchestration.
- Build increasingly complex workflows easily by incorporating advanced tasks and external services into your orchestration.
- Centralize control so you can manage everything—from configuration to execution—in one place.
Recommendations
While Extend Tasks offer great flexibility, we strongly recommend using the specialized task types (Acquire, Transform, and Publish) whenever possible. These Task types come with additional functionalities, such as advanced logging capabilities, that Extend Tasks do not provide.
In the sections below, we'll cover how to setup each Extend Task type to run from your Empower environment.
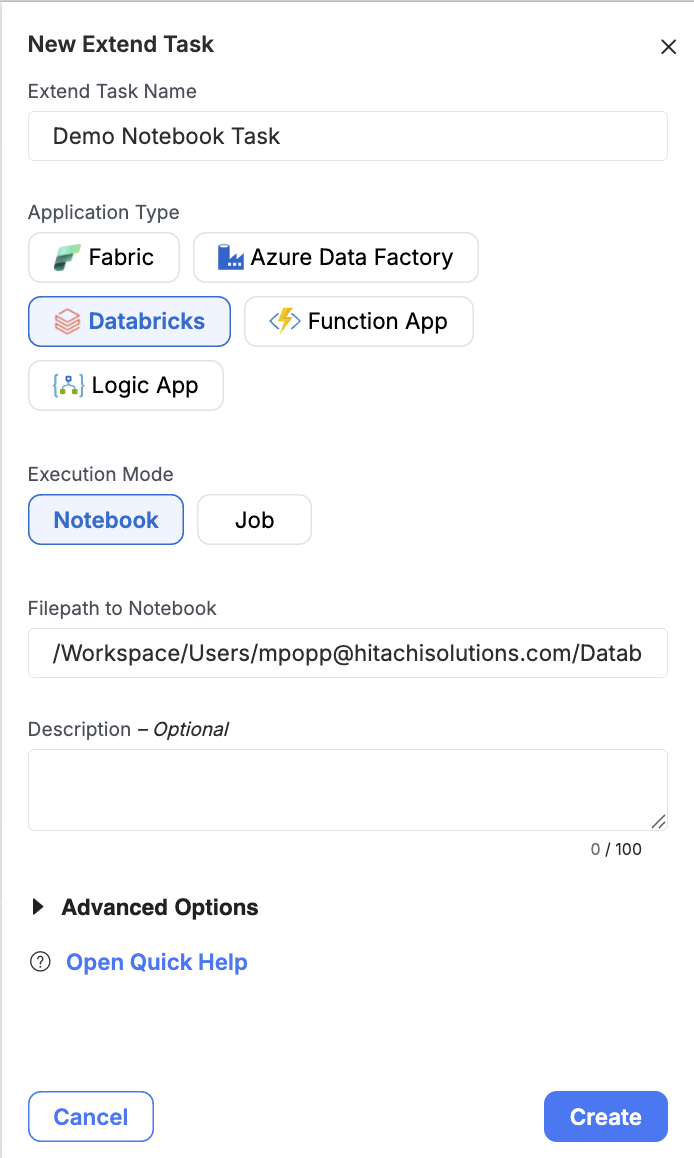
Need help while setting up an Extend Task? You can quickly open the relevant section of this guide directly from Empower by clicking the "Open Quick Help" link at the bottom of the creation form.

Azure Data Factory (ADF) Pipeline
Empower ADF Pipeline
The only input required to run a pipeline that lives in the Empower ADF is the pipeline name.
To find your pipeline name:
-
Go to your environment's resource group in Azure.
-
Search for Data Factory and select your Empower ADF. This will typically contain "client-datafactory" in the name. Select this ADF then click on Launch Studio to open it.
-
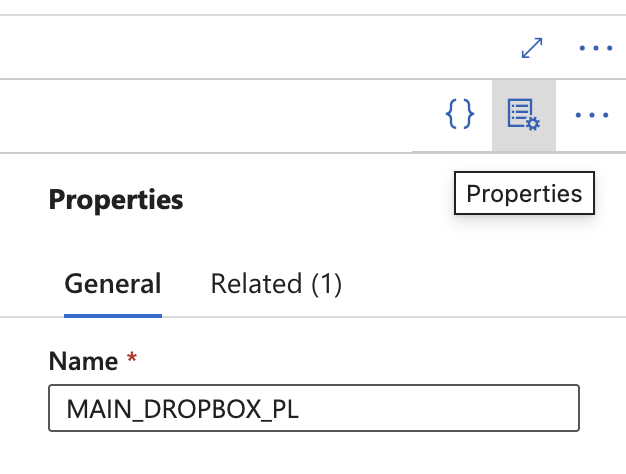
Open the desired pipeline. You can use the properties icon in the upper right hand corner to open the properties panel and easily copy out the name.
-
Paste this pipeline name into the Empower UI.
External ADF Pipeline
Pre-Requisite:
Before adding your external ADF pipeline as an Extend Task to run in Empower, we need to make sure Empower has access to run it.
To do that, you'll need to create a service principal with contributor access to your ADF. Learn more about how to create a service principal in the Microsoft docs.
Once you have your service principal created, you need to give it access to execute your ADF. To do this:
- Navigate to your ADF in the Azure Portal and select "Access Control (IAM)" from the left-hand menu.
- Select the "Role Assignments" tab.
- Click on "Add" > "Add Role Assignment"
- Add the service principal you created with the "Contributor" access role.
External ADF Pipeline
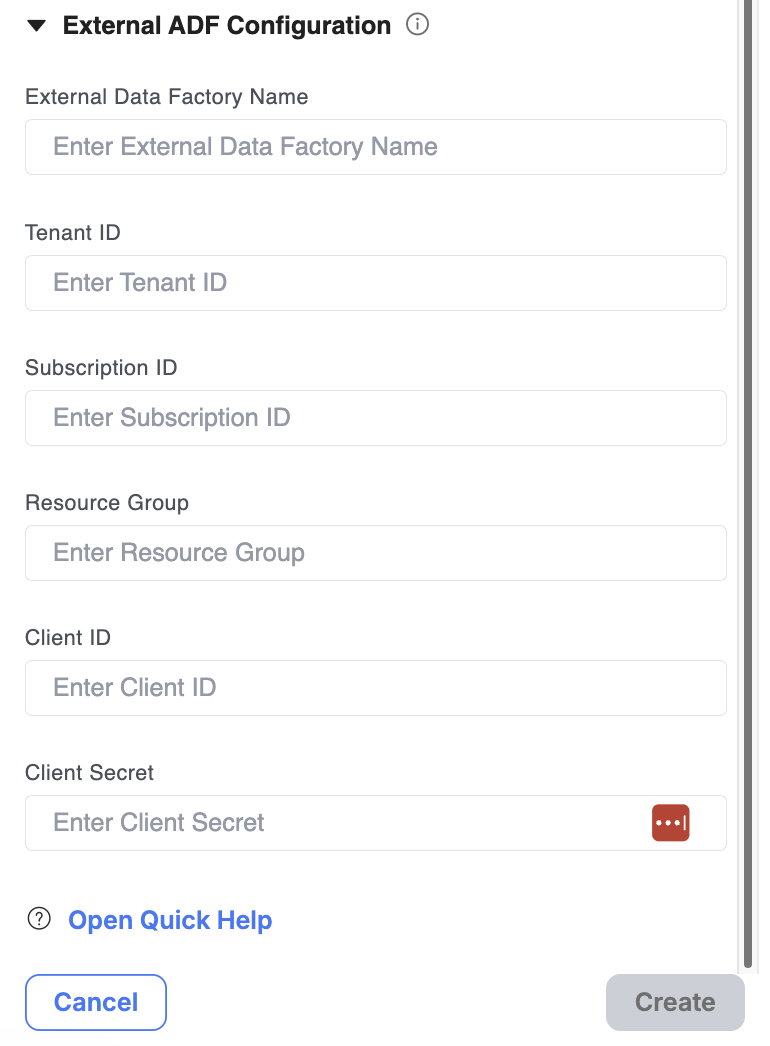
To run a pipeline that lives outside of the Empower ADF, you'll need to enter a few additional inputs:
-
External Data Factory Name:
-
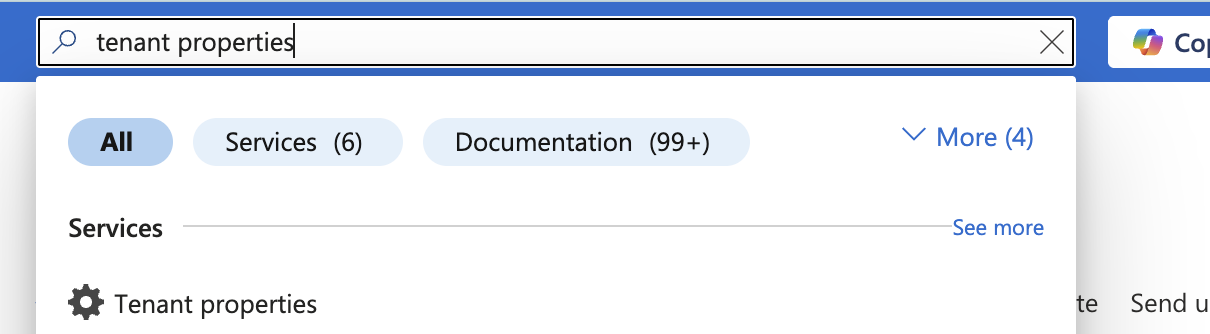
Tenant ID: Use the main search bar to search for "Tenant Properties" and select it. Copy the Tenant ID value.
-
Subscription ID: Copy "Subscription ID" from the overview page.
-
Resource Group Name: Copy "Resource group" from the overview page.
-
Client ID & Client Secret: The Client ID and Secret value of the Service Principal you created as part of the pre-requisite steps.
Databricks
Databricks Notebook
The only input required to run a Databricks Notebook is the filepath to the Notebook.
To find your Notebook filepath:
-
In Azure, navigate to the Databricks resource where the notebook you want to use is located and launch the workspace.
-
Navigate to Workspace in the lefthand menu and then find your notebook.
-
Hover over the notebook name to view copy the file path.
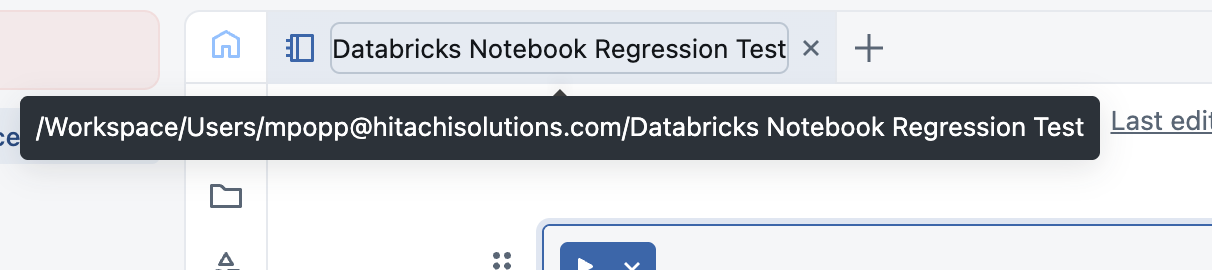
Example Databricks notebook path.
-
Paste the file path into the UI.
Databricks Job
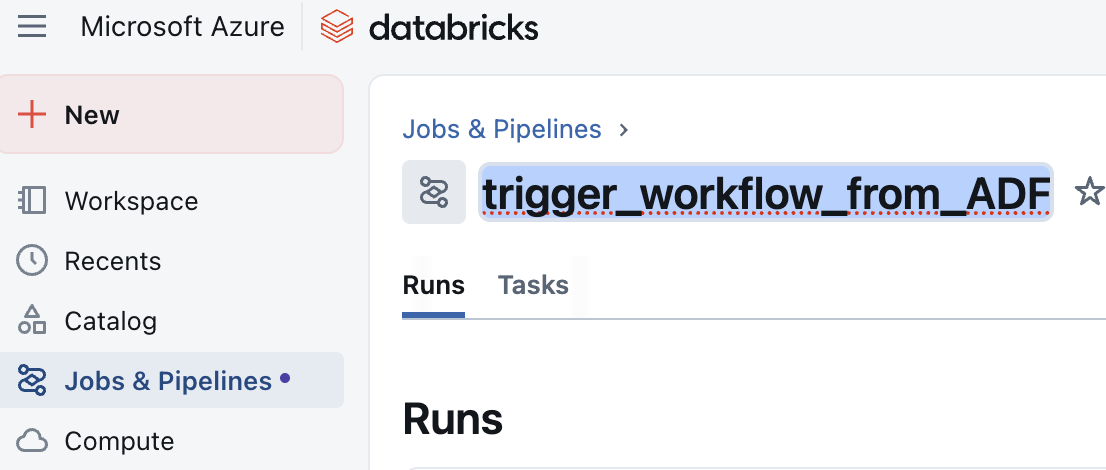
The only input required to run a Databricks Job is Job Name.
To find your Databricks Job Name:
-
In Azure, navigate to the Databricks resource where the job you want to use is located and launch the workspace.
-
Navigate to "Jobs and Pipelines" in the lefthand menu and select your desired job.
-
Copy the job name from the top of the job page:
-
Paste the job name into the UI.

Function App
Pre-Requisite:
Before adding your Function App as an Extend Task to run in Empower, we need to make sure Empower has access to run it.
To do that, you'll need to create a service principal with contributor access to the Function App. Learn more about how to create a service principal in the Microsoft docs.
Once you have your service principal created, you need to give it access to execute your Function App. To do this:
- Navigate to your Function App in the Azure Portal and select "Access Control (IAM)" from the left-hand menu.
- Select the "Role Assignments" tab.
- Click on "Add" > "Add Role Assignment"
- Add the service principal you created with the "Contributor" access role.
Empower Inputs Needed:
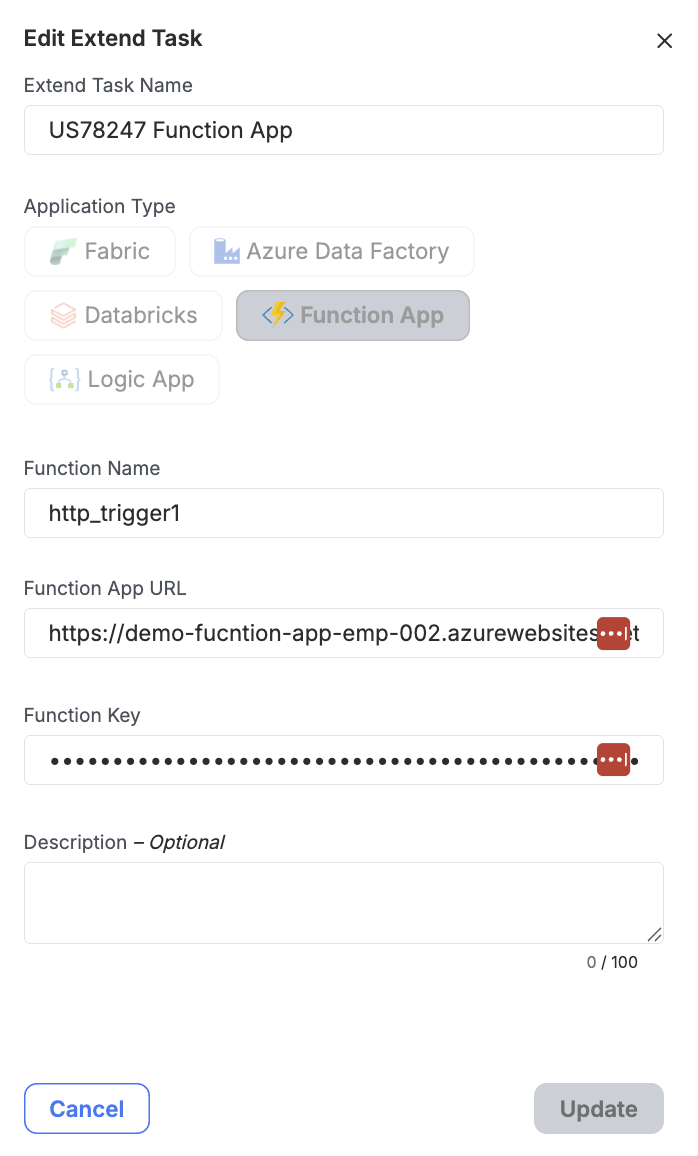
There are a couple of different inputs needed to run your Function App in Empower. Once you've navigated to your Function App in the Azure Portal, let's take a look at how to find each input needed.
-
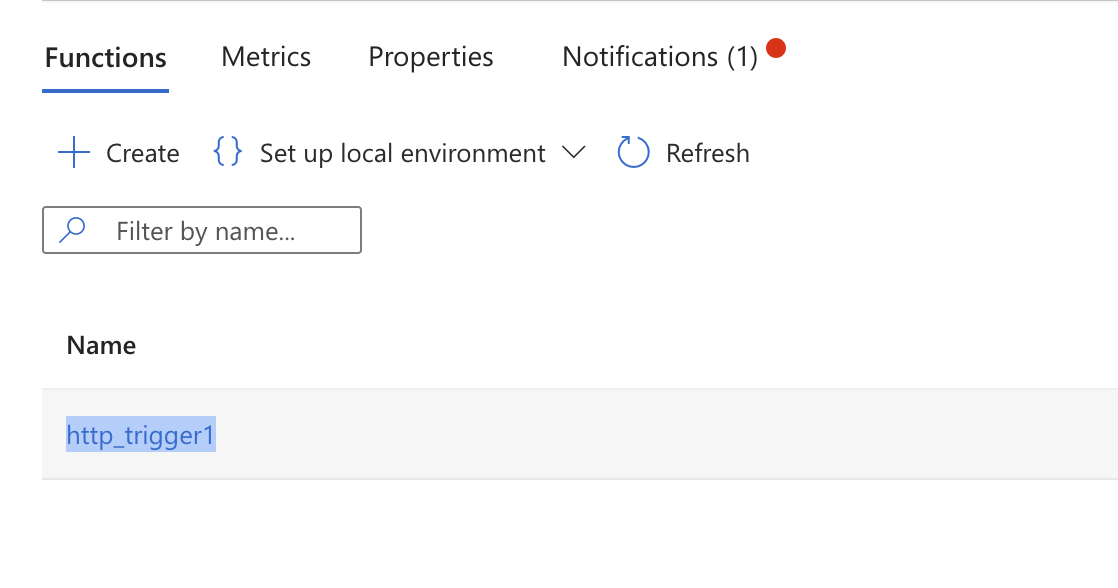
Function Name: select the overview menu item and then copy the name of the function from the table under the "Functions" tab.
-
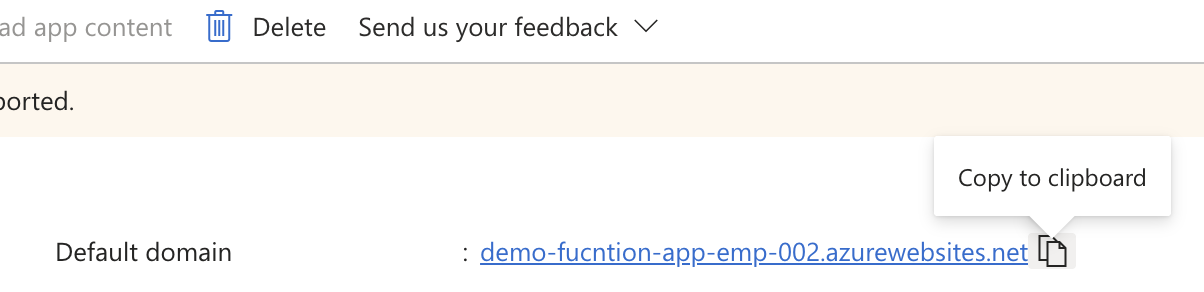
Function App URL: In the function app overview, copy the "default domain" and add "https://" at the start for the URL.
-
Function Key:
- Select the overview menu item and then click on the name of the function from the the table under the "Functions" tab.
- Click on the "Function Keys" tab.
- Select "New Function Key".
- Provide a desired "Name" and "Value" then click "Add". Note that it is recommended to create a long, complex key.
- Paste in the "Value" you gave it into the Empower UI.
-
Logic App
Pre-Requisite:
Before adding your Logic App as an Extend Task to run in Empower, we need to make sure Empower has access to run it.
To do that, you'll need to create a service principal with contributor access to the Logic App. Learn more about how to create a service principal in the Microsoft docs.
Once you have your service principal created, you need to give it access to execute your Logic App. To do this:
- Navigate to your Logic App in the Azure Portal and select "Access Control (IAM)" from the left-hand menu.
- Select the "Role Assignments" tab.
- Click on "Add" > "Add Role Assignment"
- Add the service principal you created with the "Contributor" access role.
- You will also need to grant it the Logic Apps Standard Developer (Preview) role. This role allows Empower to read and output the status of it's run history.
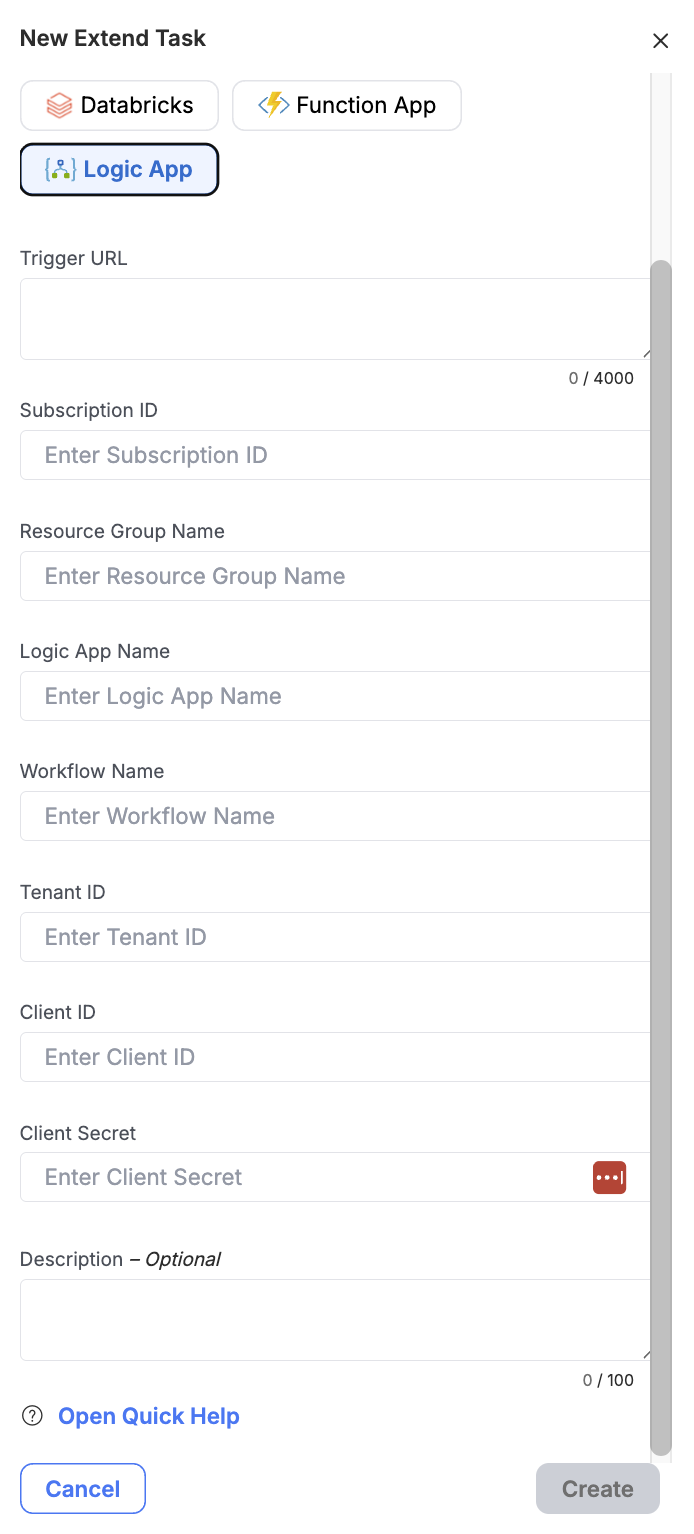
Empower Inputs Needed:
There are a couple of different inputs needed to run your Logic App in Empower. Once you've navigated to your Logic App in the Azure Portal, let's take a look at how to find each input needed.
-
Trigger URL: Copy "Default domain" from the overview page.

-
Subscription ID: Copy "Subscription ID" from the overview page.
-
Resource Group Name: Copy "Resource group" from the overview page.
-
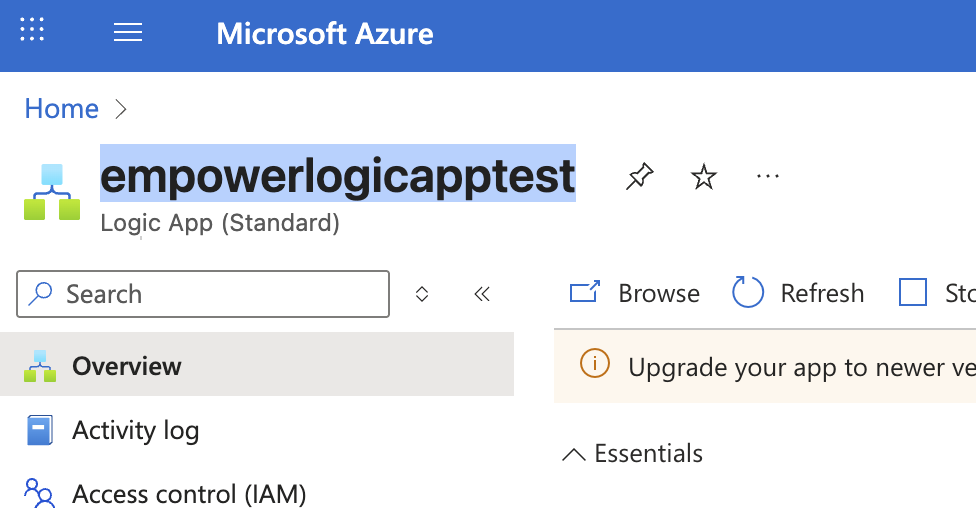
Logic App Name: Copy the name of the Logic App from the top of the screen.
-
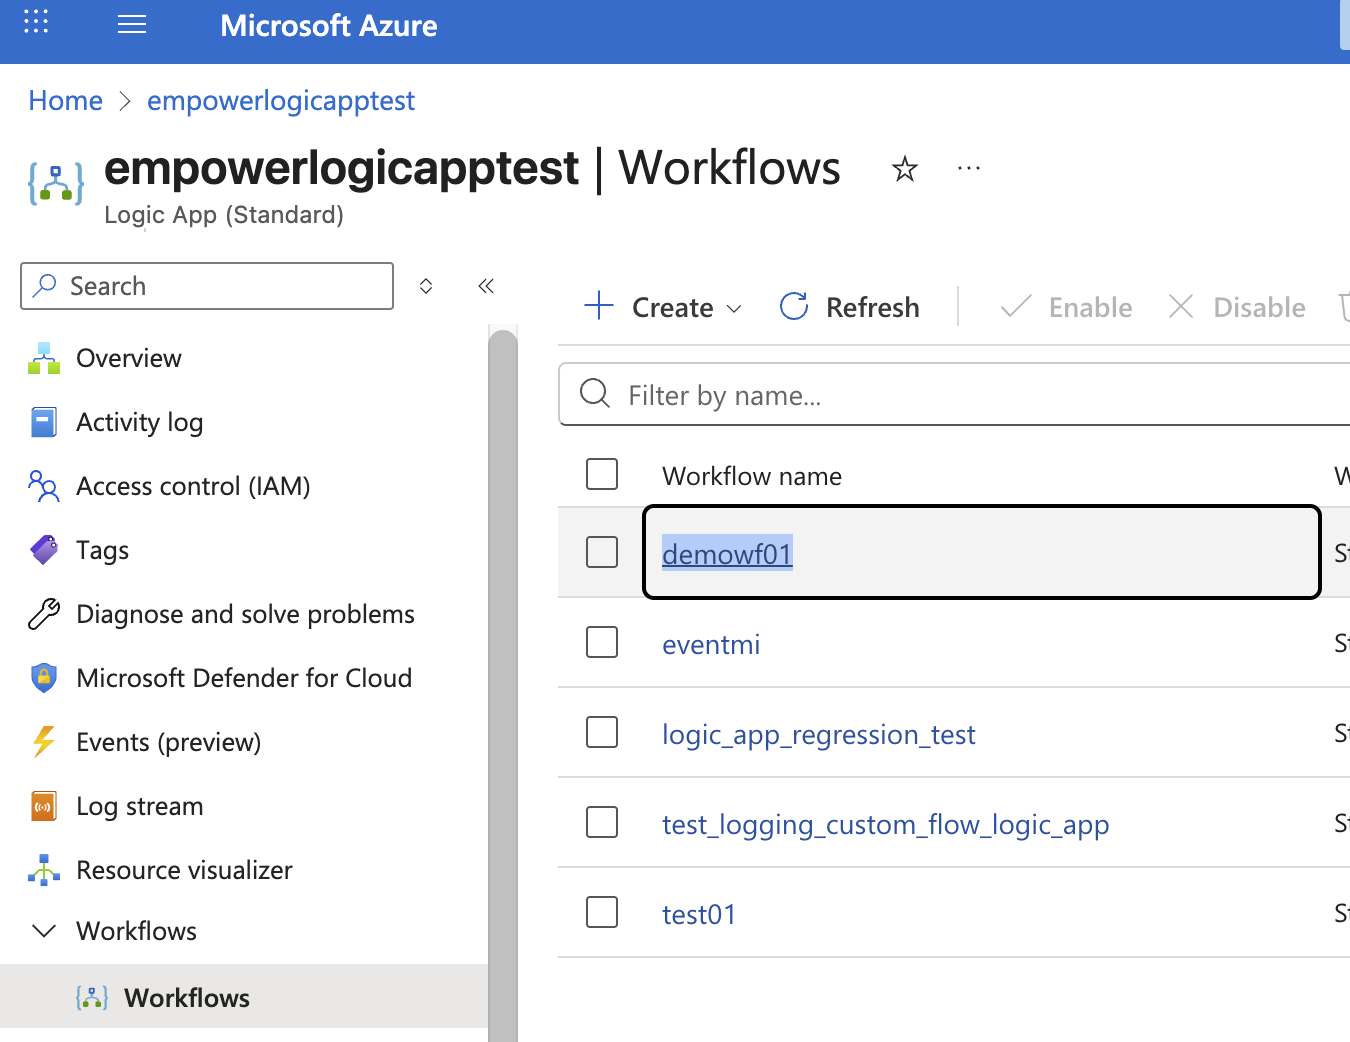
Workflow Name: Click on the Workflows menu option then copy the name of the Workflow you want to run.
-
Tenant ID: Use the main search bar to search for "Tenant Properties" and select it. Copy the Tenant ID value.
-
Client ID & Client Secret: The Client ID and Secret value of the Service Principal you created as part of the pre-requisite steps.
-
Fabric
Fabric Notebook
Pre-Requisite:
Before adding your Fabric Notebook as an Extend Task to run in Empower, we need to make sure Empower has access to run it.
To do that, you'll need to create a service principal with contributor access. Learn how to do this in the Microsoft Fabric documentation here.
Empower Inputs Needed:
To run your Fabric Notebook within Empower, you’ll need a few key inputs. After opening your Fabric instance, we’ll walk through where to locate each required input.
-
Notebook ID: 1. Navigate to your desired Fabric Notebook and copy the ID value where notebook ID is indicated in the URL below:
-
Workspace ID: Navigate to your desired Fabric Notebookand copy the ID value where workspace ID is indicated in the URL below:
-
Tenant ID: Use the main search bar to search for "Tenant Properties" and select it. Copy the Tenant ID value.
-
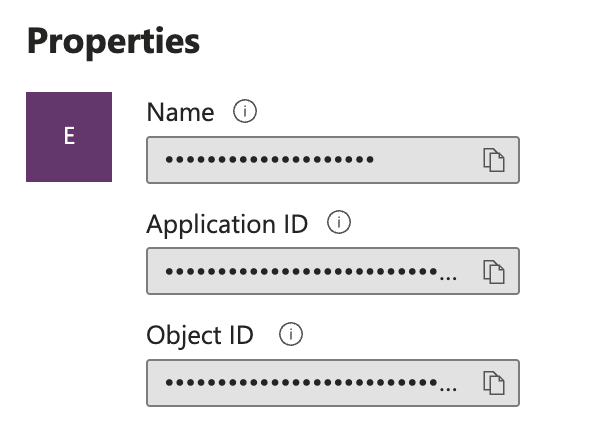
Client ID:
-
Navigate to the service principal you created in the pre-requisite steps.
-
Copy the Application ID and paste it into the Client ID field in Empower.
-
-
Client Secret:
- Navigate to the service principal you created in the pre-requisite steps.
- Select Manage then Certificates and Secrets in the left-hand menu.
- Click on "New client secret"
- Copy the value of the secret you created and paste it into the "Client Secret" field in Empower.

Fabric Data Pipeline
Pre-Requisite:
Before adding your Fabric Pipeline as an Extend Task to run in Empower, we need to make sure Empower has access to run it.
To do that, you'll need to create a service principal with contributor access. Learn how to do this in the Microsoft Fabric documentation here.
Empower Inputs Needed:
To run your Fabric Pipeline within Empower, you’ll need a few key inputs. After opening your Fabric instance, we’ll walk through where to locate each required input.
-
Pipeline ID: 1. Navigate to your desired Fabric Pipeline and copy the ID value where pipeline ID is indicated in the URL below:
-
Workspace ID: Navigate to your desired Fabric Notebookand copy the ID value where workspace ID is indicated in the URL below:
-
Tenant ID: Use the main search bar to search for "Tenant Properties" and select it. Copy the Tenant ID value.
-
Client ID:
-
Navigate to the service principal you created in the pre-requisite steps.
-
Copy the Application ID and paste it into the Client ID field in Empower.
-
-
Client Secret:
- Navigate to the service principal you created in the pre-requisite steps.
- Select Manage then Certificates and Secrets in the left-hand menu.
- Click on "New client secret"
- Copy the value of the secret you created and paste it into the "Client Secret" field in Empower.

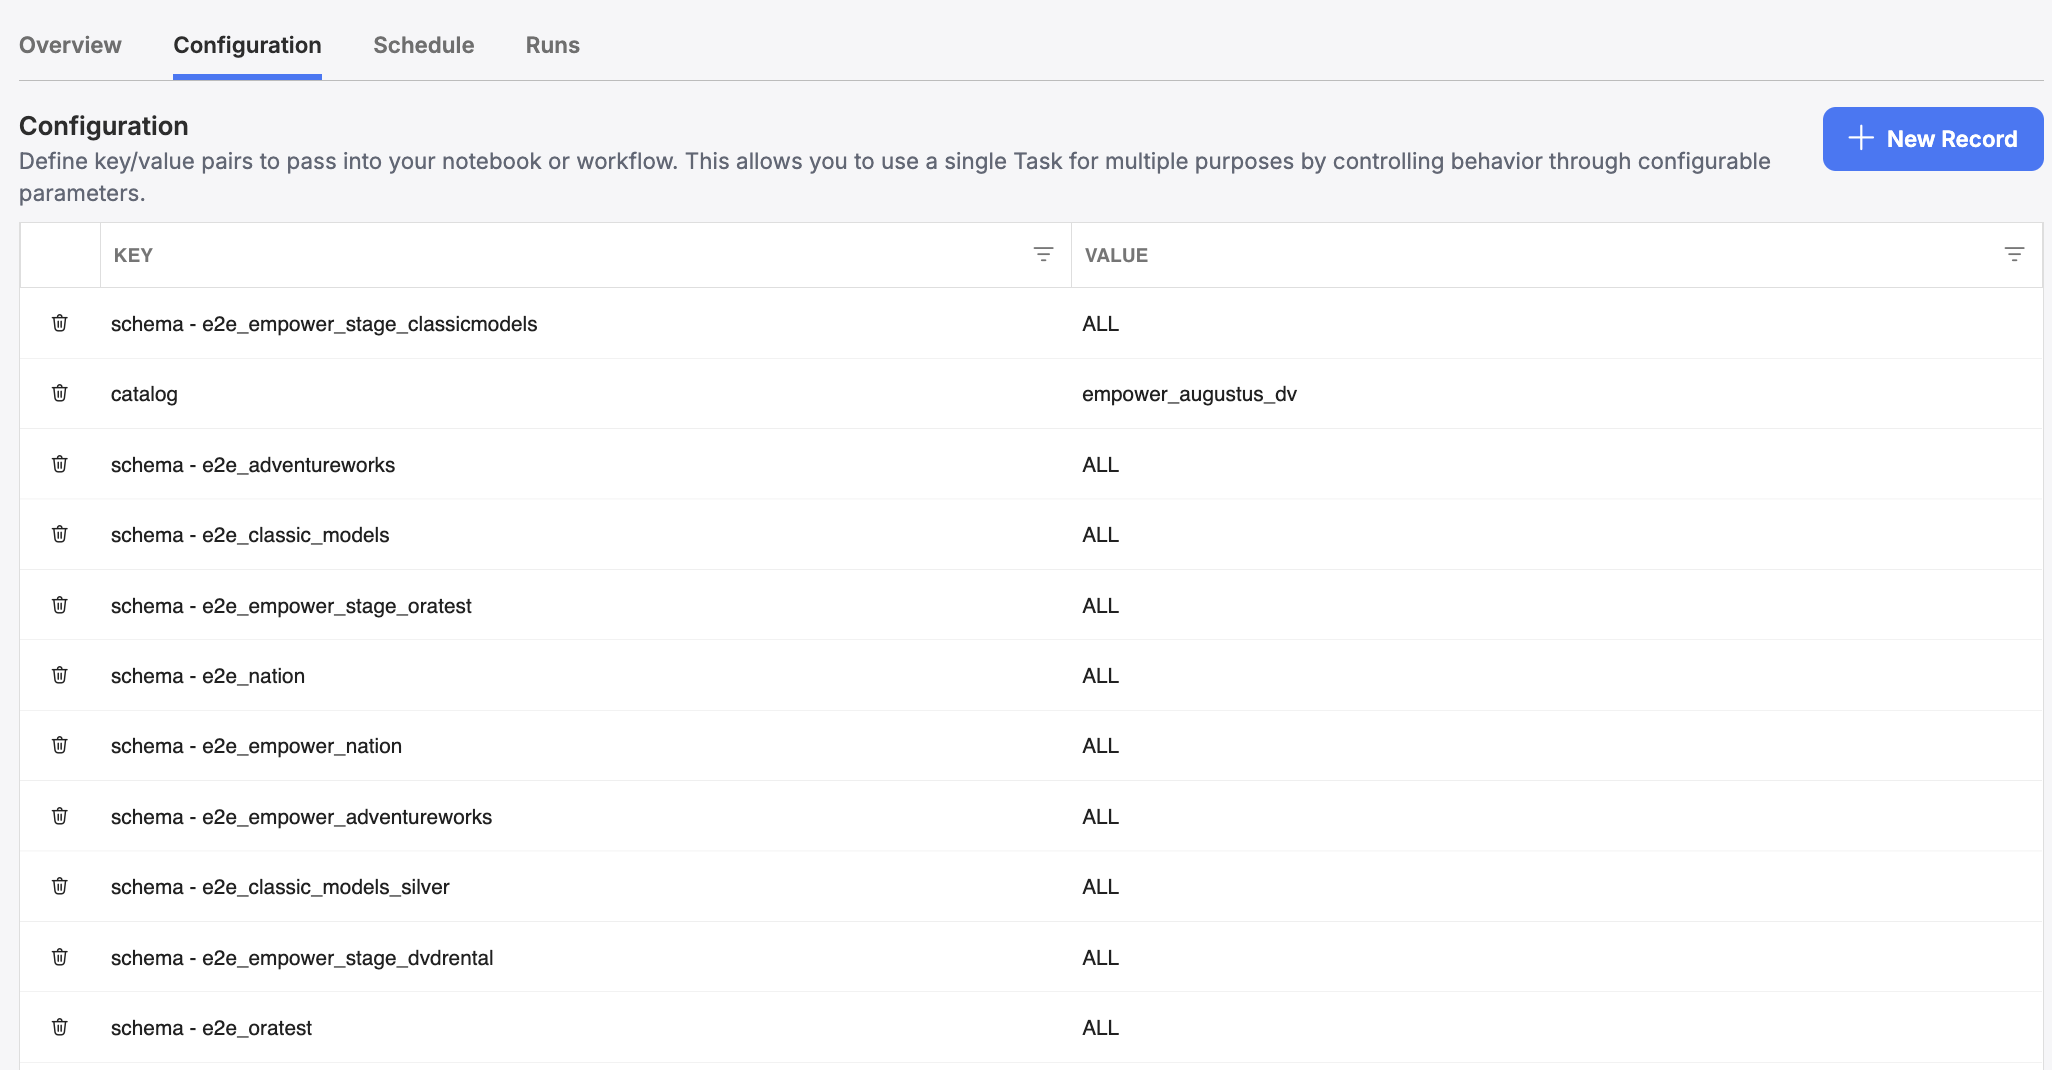
Configuration
After creation, you will see a tab option for Configuration. Cc\onfiguration of Extend Tasks allows you to pass key value pairs to the service you want to execute. This is helpful if you want to be able to have a single notebook/pipeline/job/app used for multiple purposes based on some variable parameters. To add these, simply click on the "Configuration" tab and then "Add new Record" to add your key value pairs.
Updated 27 days ago