Access Control
Introduction
The Access Control module is where qualified users manage user roles in the Empower application. This page describes the supported roles for this application and their respective permissions. It also explains how to add new users, update existing users, and remove existing users from the application.
Prerequisites
- Empower application is successfully onboarded into the client tenant. See Onboarding and Prerequisites section for more detail.
- Users are set up in Entra ID (Formerly Azure Active Directory).
- Empower team (Super Admin) has assigned Enterprise Admin role to the identified client user(s).
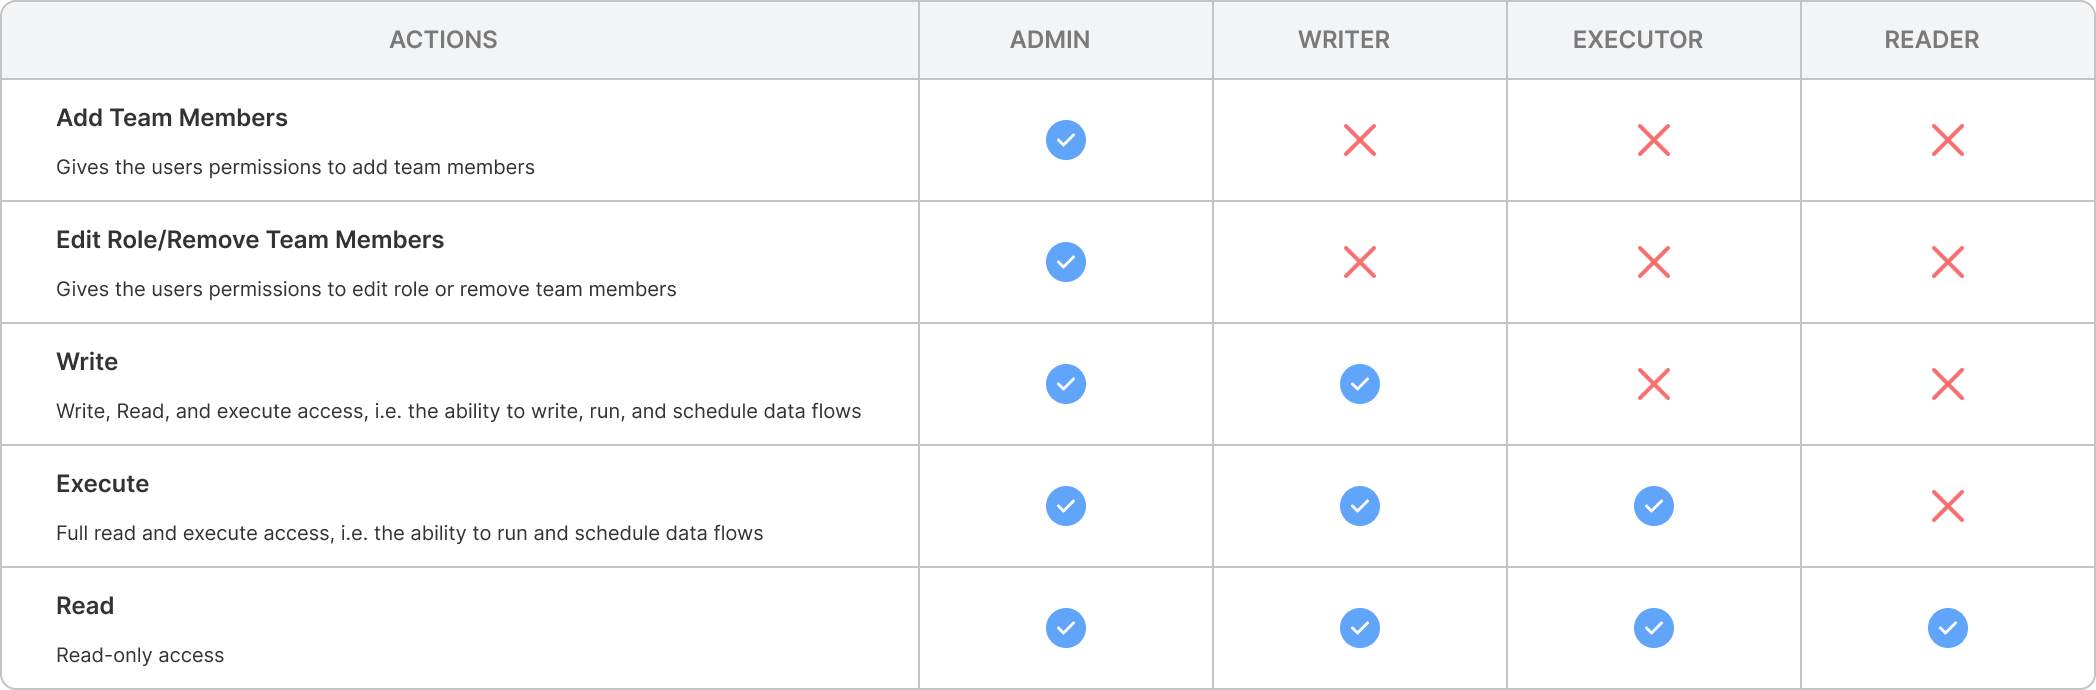
Roles & Permissions: Explained
The chart below lists, in descending order by total permissions granted, the supported roles and their respective permissions for the Empower application. This paradigm assumes the highest assigned role to a given user when providing permissions for that user.
For example...A user that needs to run data flows in a production environment need only an Environment Executor role assignment.
Another user that needs to run data flows in any Organization and/or Environment within an Enterprise, would need an Enterprise Executor role assignment.
Depending on your Enterprise's structure and internal user-base for the Empower application, organization-level roles may not apply to your roles setup.
Reminder: Access Trickles DownIf you are an admin at the "Enterprise" level, you will be an admin for all Organizations and Environments within that Enterprise, for example. The same is true for the Organization level to Environments.
Reminder: Access Defaults to HighestIf a user is a assigned a reader role, and a group that the user is a member of is assigned an executor role, RBAC will respect the highest granted permission. In this case, the user will be at an executor-role level of access.
In another example, if you assign a user group all reader access, and one user of that group admin, that user will have an admin-role level of access.
Accessing the Module
After successful login, select the Settings button from the bottom of the left-hand navigation bar.
Selecting the Settings will direct you to the systems settings screen for the Empower application. In the updated left-hand navigation bar, select the Access Control tab to access the module (pictured below).
Role Access Hierarchy: Explained
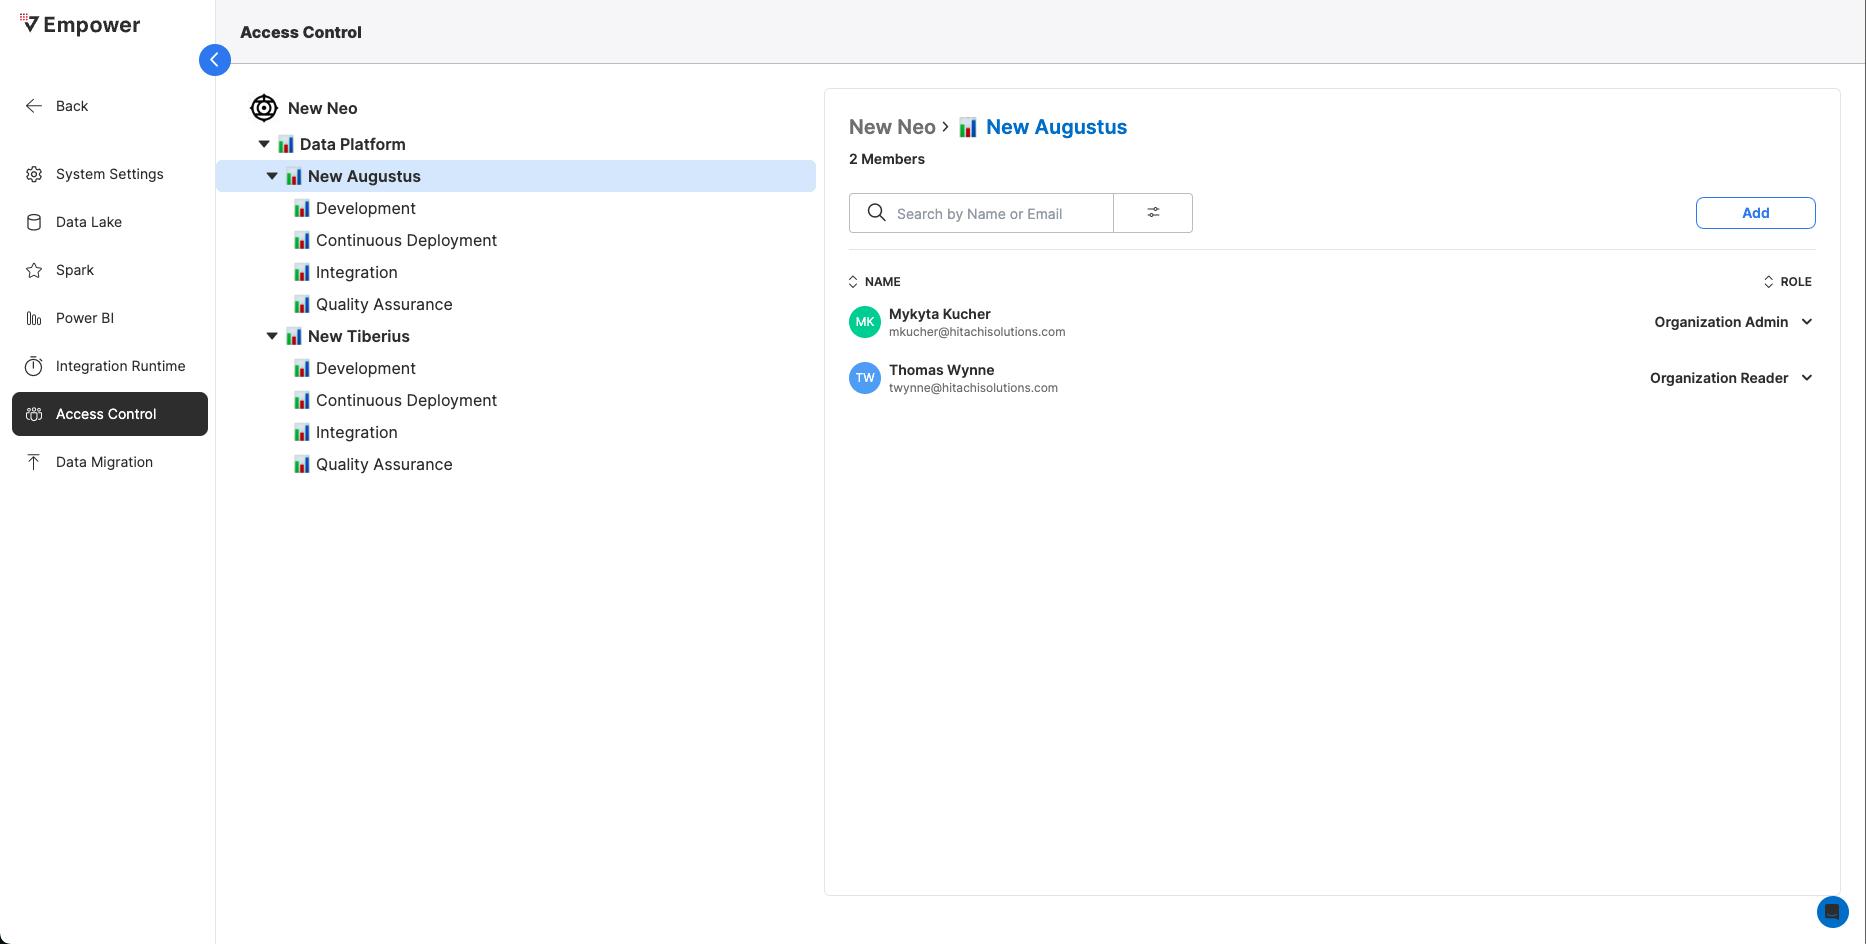
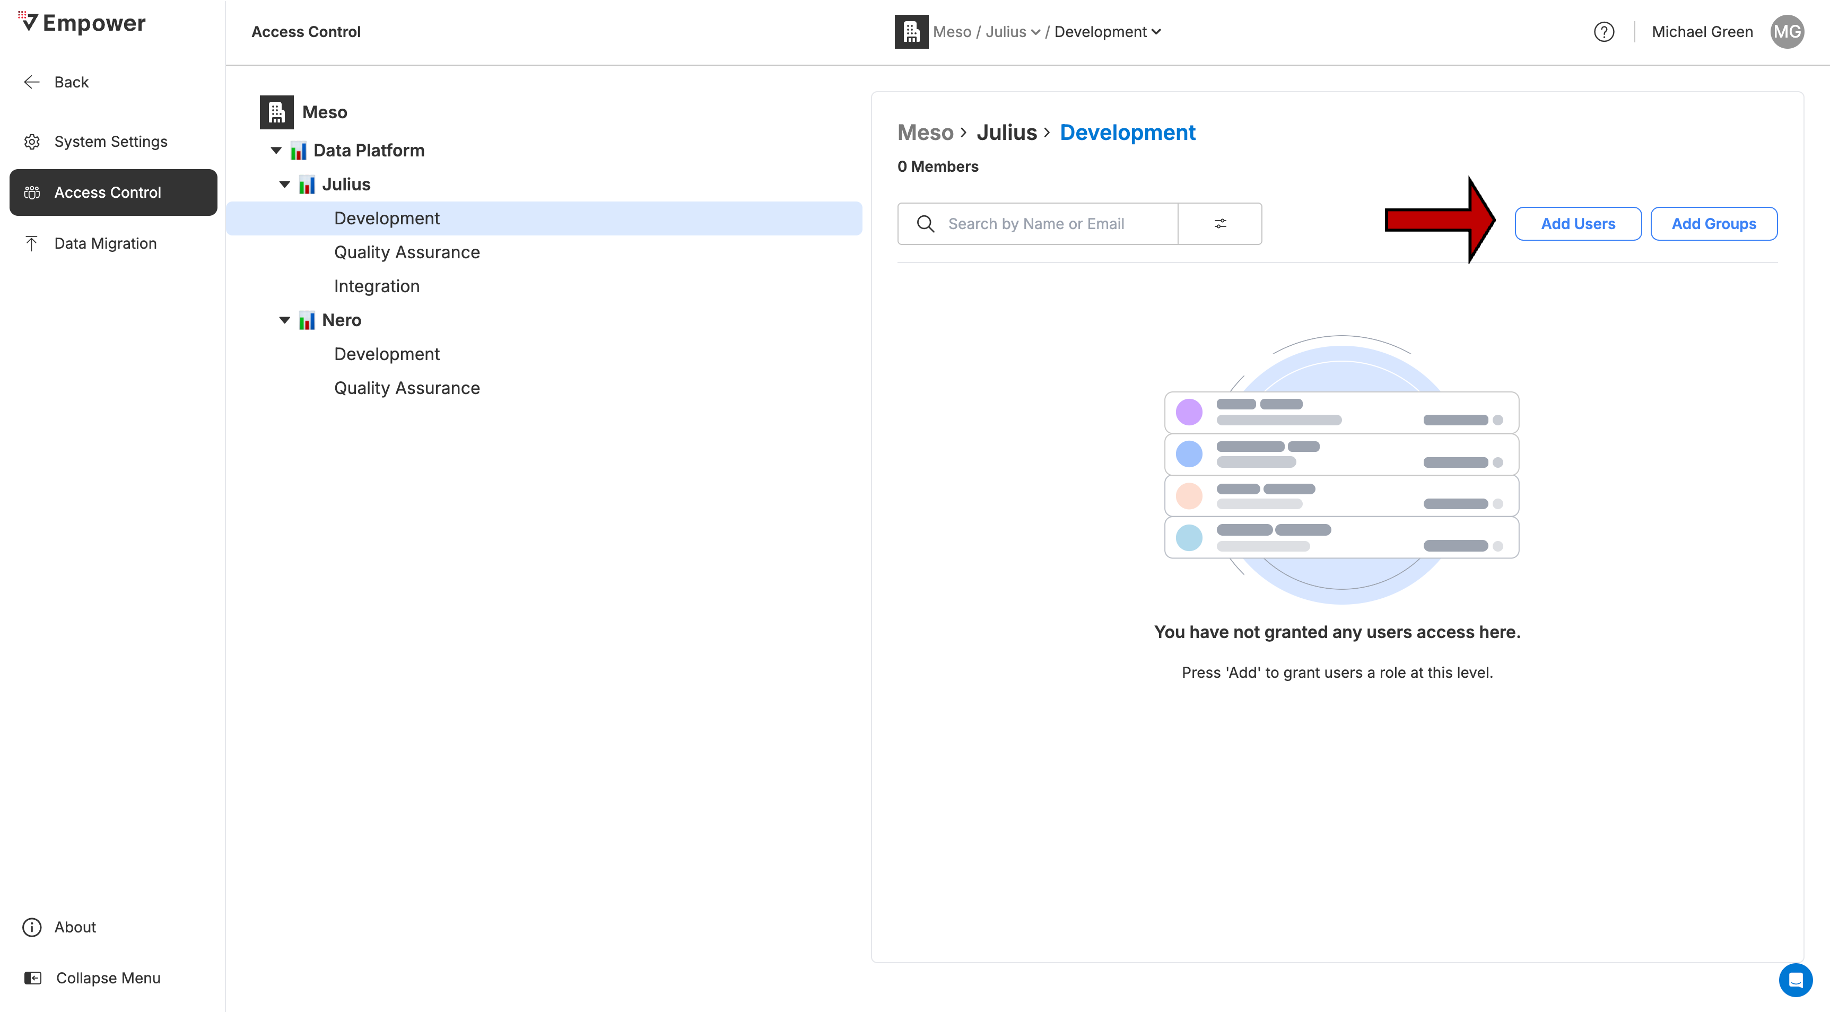
Once you've accessed the Access Control module, you'll notice a hierarchical selector on the left-side of the screen. Each of the selectable entities in this hierarchy represents a tenant (enterprise), sub-tenant (organization), or environment to which a user requires access.
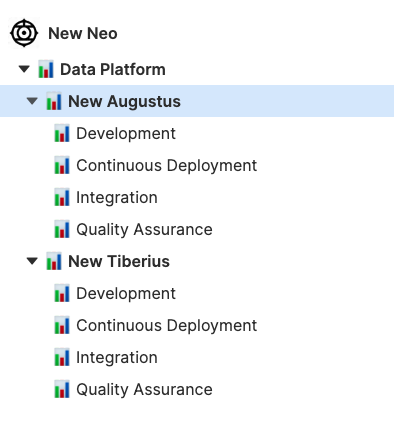
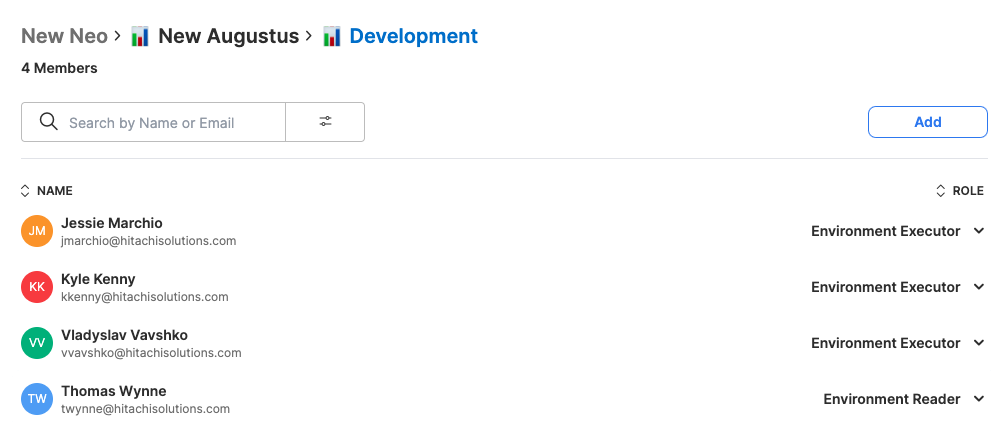
The image above shows the Empower tenant/sub-tenant hierarchy for a hypothetical enterprise called New Neo. This enterprise has two organizations, New Augustus and New Tiberius that use Empower. Whenever an entity is selected in the hierarchical selector, the right-hand side of the screen will update to show the assigned users and groups in that tenant/sub-tenant and their respective roles (pictured below).
Adding, Updating, and Removing a User or Group
Add User or Group
To add a new user or group with a role assignment, select the Add User or Add Group button from the Access Control main page.
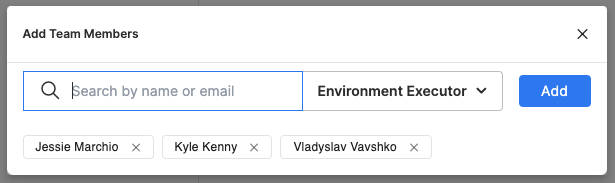
Selecting the Add button opens the add modal (pictured below). You can perform a typeahead search to narrow your search results. Once a user or group is selected, use the drop down to select the assigned role for your selection. To save time, you can add multiple selections to the same role in the same action by selecting the Add button in the modal.
Update/Remove User or Group
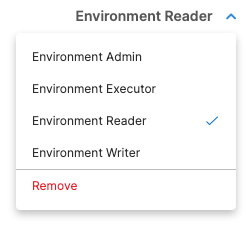
To update an existing user or group role, select the tenant/sub-tenant on the left-hand side to display the users and groups for that area, which will update on the right-side of the screen. From there, select the drop down next to the user or group to update the role (pictured below).
If you are attempting to reassign a user or group to a higher tenant/sub-tenant role, you will need to remove the user or group from their lower-tenant role and then navigate to the higher level tenant to reassign the user or group there. For example, if Jessie Marchio is currently an Environment Reader in your development environment, but she needs to access to schedule and run data flows in all environments, consider assigning her to an Enterprise Executor role at the enterprise level in the hierarchical selector (or Organization Executor depending on your organizational makeup).
Search & Filter Existing Users & Groups
Search Users & Groups
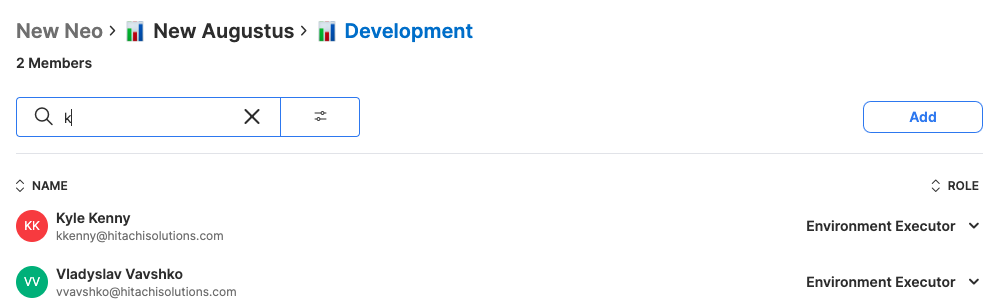
Once the tenant/sub-tenant is selected and the user/group list is displayed, typing in the search bar at the top of the users list will update the existing users list based on the search criteria entered. In the example below, the user is searching for user 'Kyle Kenny'. Even by typing the first character, 'k', the search result updates to find the listing of users that meet that search criteria.
Filter Users & Groups
Next to the search bar is the filter selection button. Selecting this opens a dropdown of filter criteria for the existing users and groups. At this time, you can filter search results by applicable roles within that tenant/sub-tenant.

Updated 9 months ago