Model
The Model module is accessible by clicking on Model from the navigation pane.
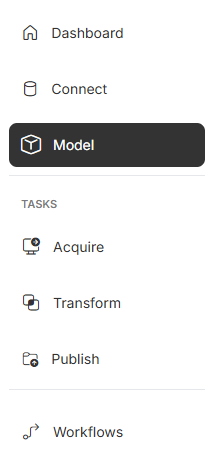
Click Model to load the Model module.
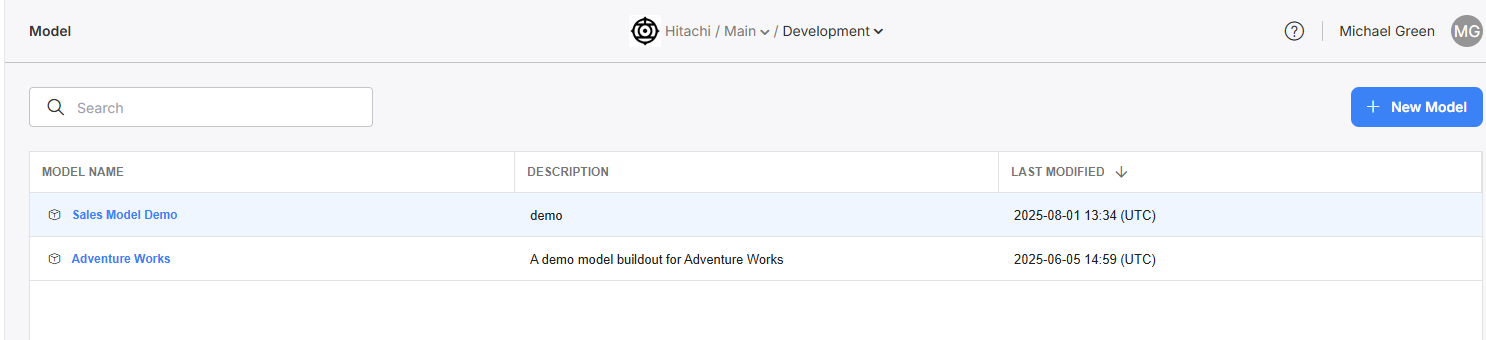
From the Models module, you can view and manage all models within your selected environment. A model holds all the information and configuration necessary to successfully transform data into analytical models.

The Models module, listing out all models in the Development environment.
Question: How are models used?Models are the unit of measure for an atomic model building process. When the model building process is complete, the model is the final built list of gold-layer objects to be used for end processes, such as reporting, AI workflows, or uses.
Every Transformation Task must be associated with one model. The Entity, Entity Columns, and Entity dependency columns for that model will then appear within that task's Configuration.
WARNING: A model change will be reflected for all associated tasks!For example: Task A and Task B are both associated with Model P.
If a user makes changes to an Entity within Task A's configuration, those changes will also take effect for Task B's configuration, as they share the same Model P.
This table displays a list of all models currently in your environment. You can view a model's name, description, and toggle it active or inactive.
Creation
To create a new model, click on "New Model".
Click "New Model" in the upper right hand corner to create a new model.
This will bring up the model creation blade. Fill out the name (required) and the description (optional) before clicking create.
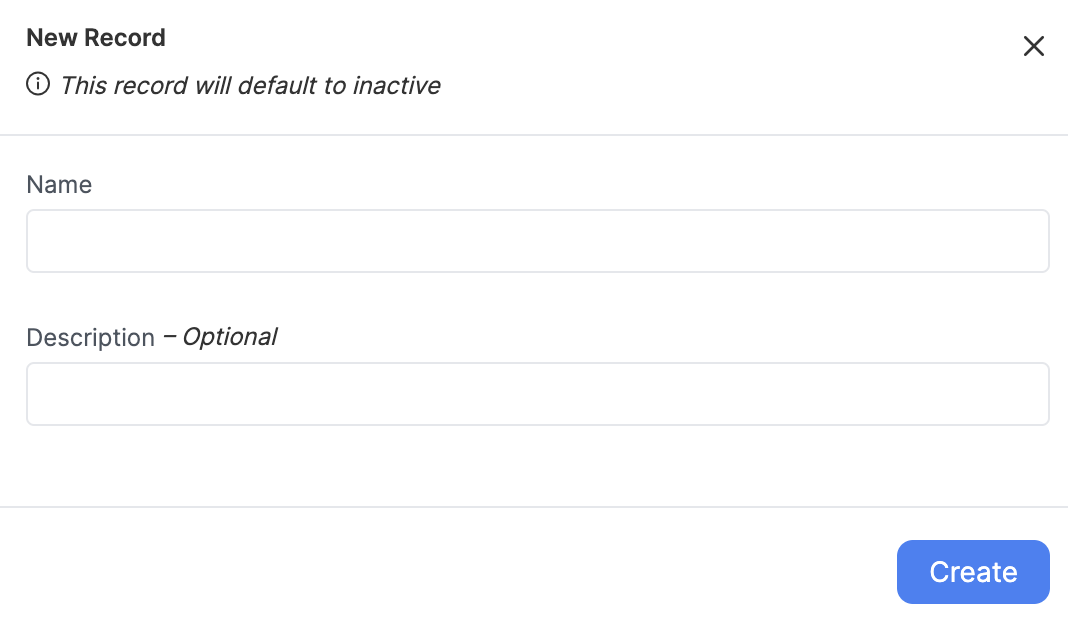
Fill in the name and optional description fields in the creation blade. Then click "Create."
You can see this new model exists in the Model table.
Overview
Click into a model to view its overview and configuration screens. The default page for any model is the Overview screen. Here you can view and edit name/description information, as well as view any Transform Tasks affiliated with this model.
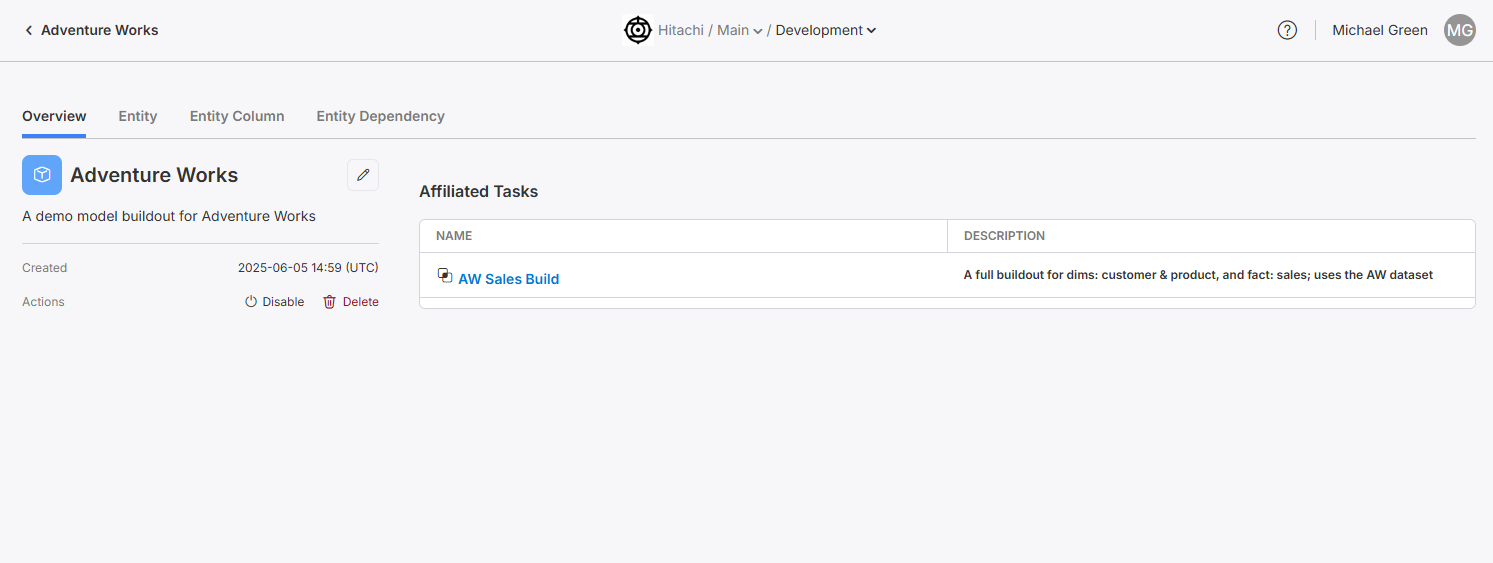
Click into a model to view its overview page.
Entities
What are Entities?Entities are the gold-layer tables that are generated during the model building process. You can built any number of entities during a model build. Entities can be built using data from any bronze or silver table in your data estate. They can even be built using other gold-layer entities!
Know your Staging Notebook Locations!This section assumes you have your staging notebooks written and locations to those notebooks are known. We will be configuring those locations to the entries in the Entities table, so have those on hand.
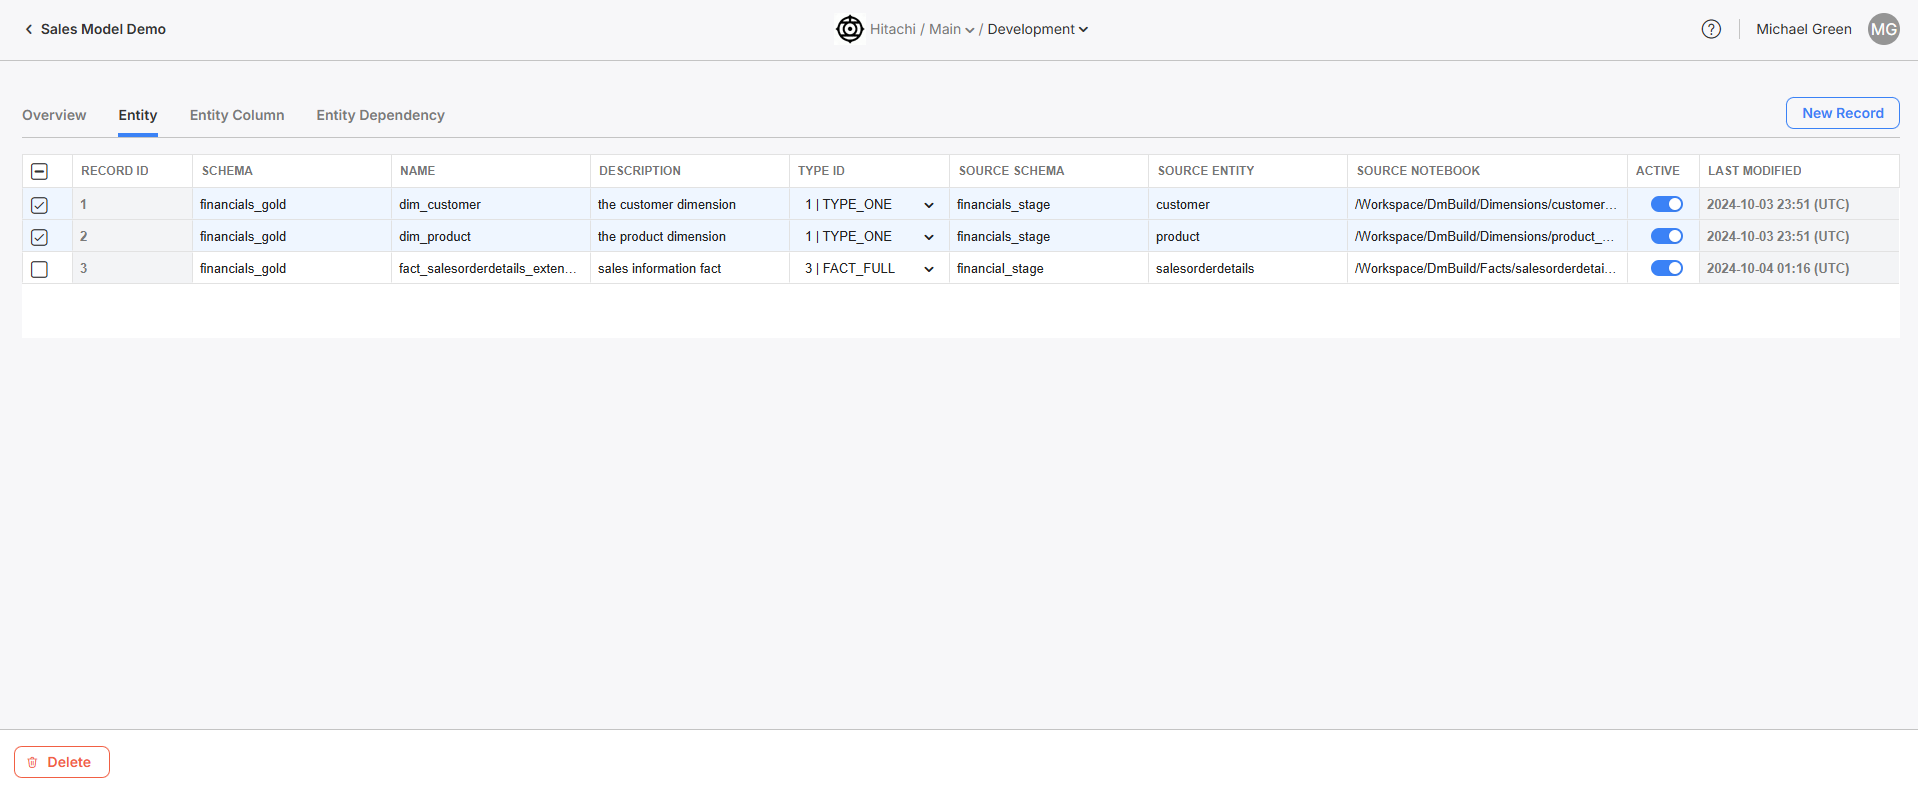
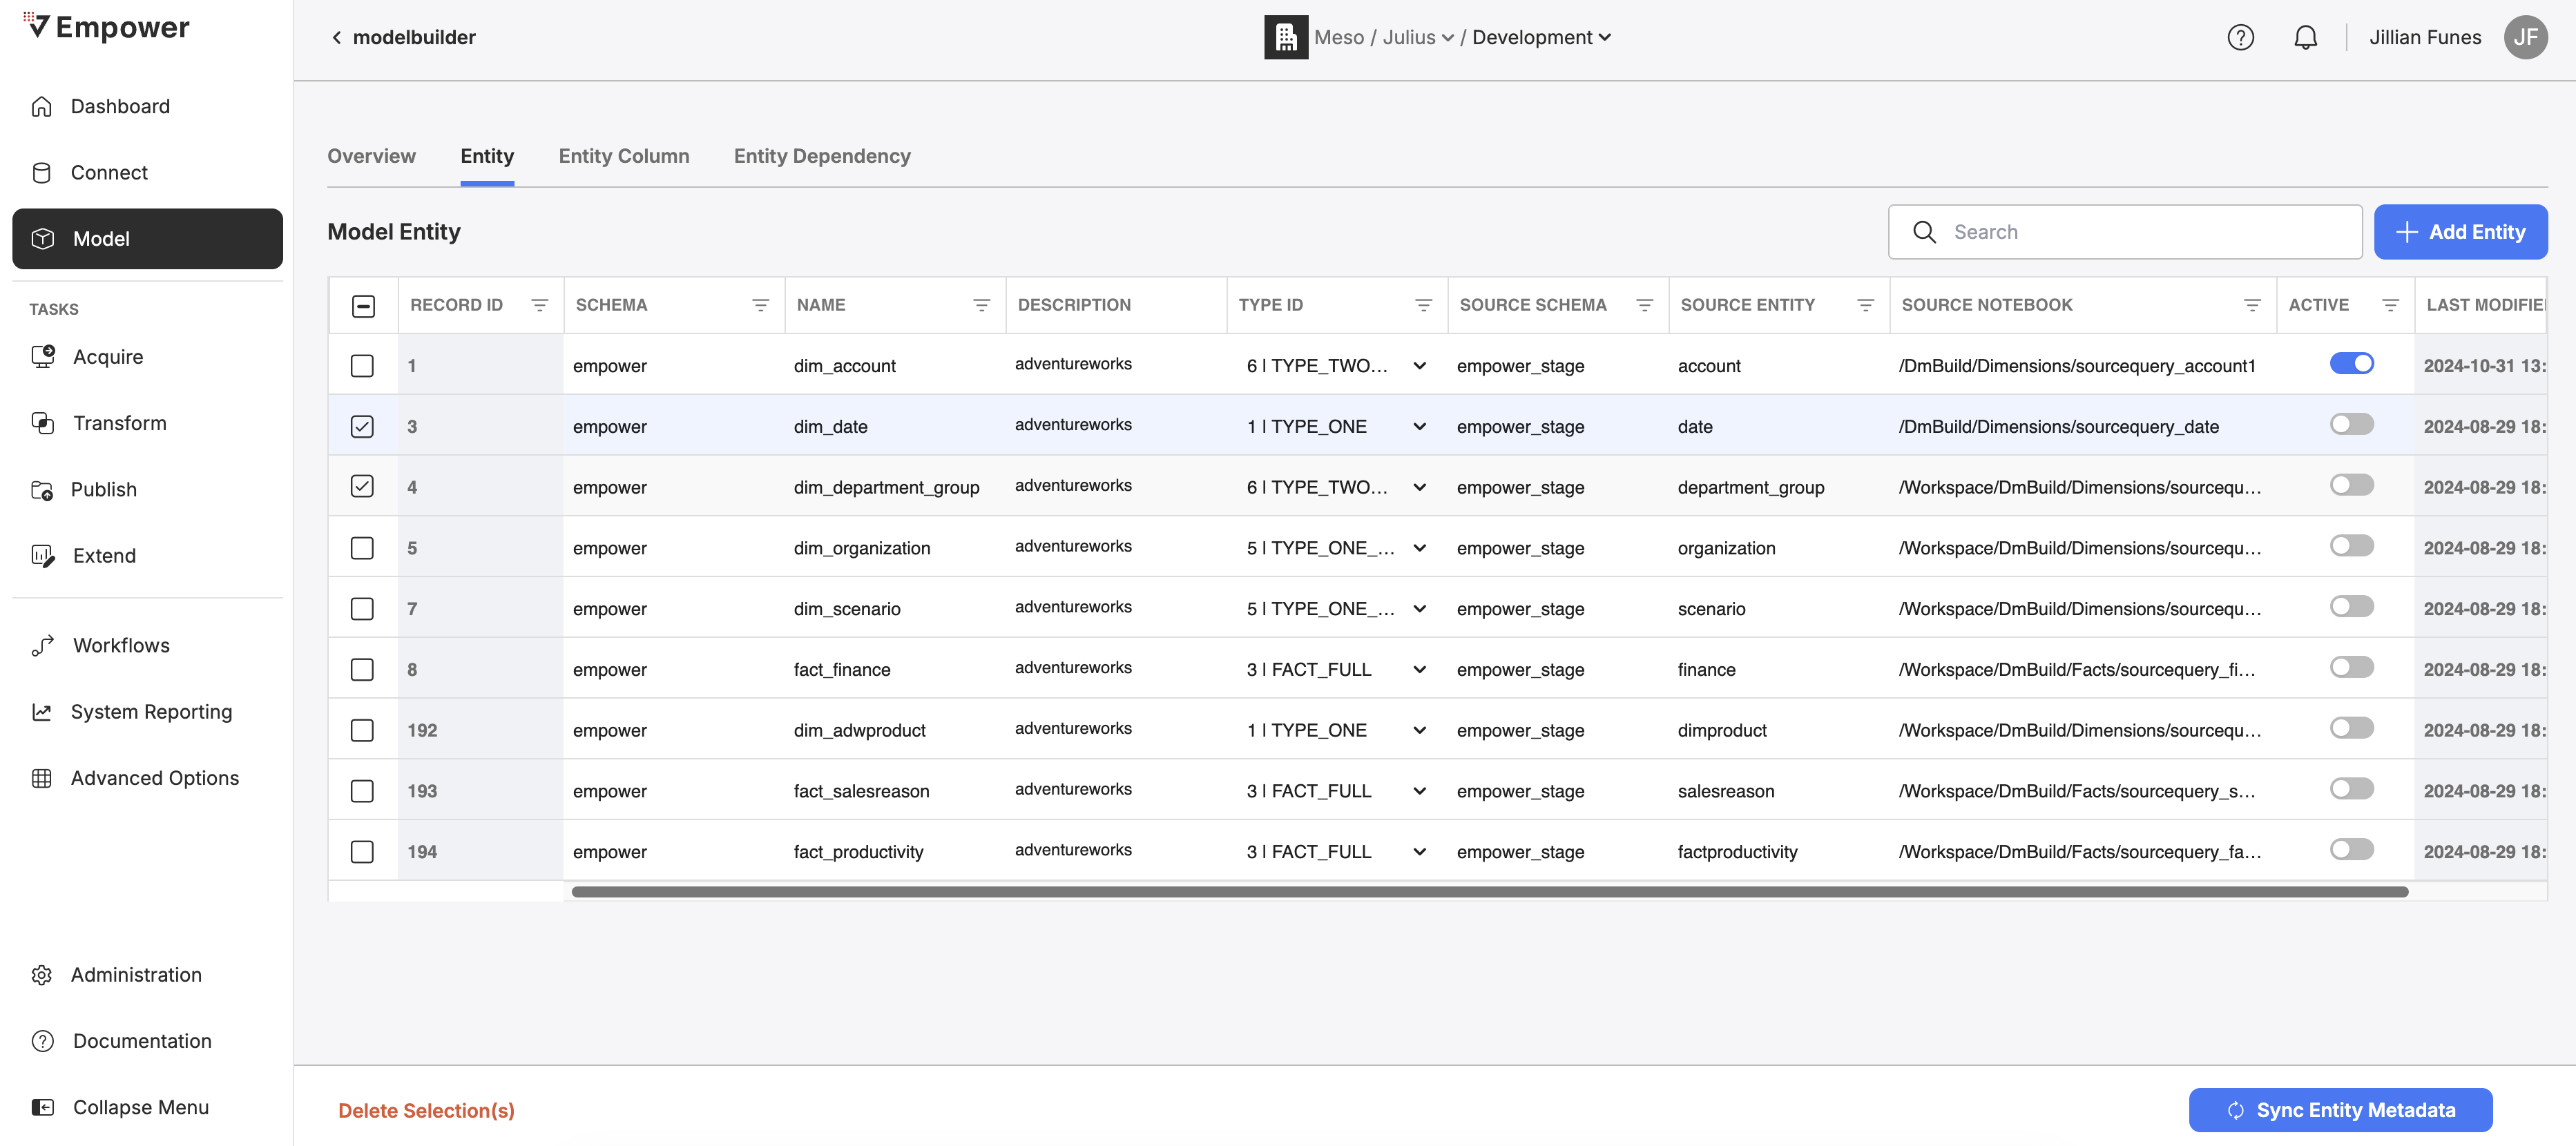
The Entity table defines the list of dims and facts for the Transformation Task's model. For each Entity, you can view its schema, the name of the entity and description, its type (a various assortment of dim and fact types), the source schema and source entity, and the staging notebook that this entity is built within. You can activate and deactivate any entity on demand. Deactivated entities will not be built during a model build process.

The Entity table, where you can view and edit information about all entities within this Model.
Below is a table describing each of the Entity columns and example values.
| Column Name | Description | Example Value |
|---|---|---|
| Record ID | The unique generated ID for this entry (autogenerated). | 1 |
| Schema | The destination schema for this entity, i.e. which schema will this entity "live within" after being fully built. | empower-finance |
| Name | The name for this entity, i.e. what will this table be called. The newly built entity will "live within" this table after being full built. | dim_product |
| Description | A short description of this entity and what its for. | the product dimension for empower-finance, division A |
| Type ID | The type for this entity, can be any one of several dim and fact types, see Entity Types below. | TYPE_ONE |
| Source Schema | The schema that the source notebook will write to and model builder will read from. | empower_stage |
| Source Entity | The table that the source notebook will write to and mode builder will read from. | product |
| Source Notebook | The location in DBFS where the staging notebook for this entity is. This is the notebook that will be run during the build phase for this entity, and the results placed in [schema].[name] | /DmBuild/Dimensions/sourcequery_product |
| Active | A toggle to activate/inactivate this entity | On |
| Last Modified | An uneditable field that displays the last time this entity was updated | 2023-08-23 19:09 (UTC) |
Entity Creation
Create a new entity by clicking on "New Record". This will bring up the new Entity creation modal.
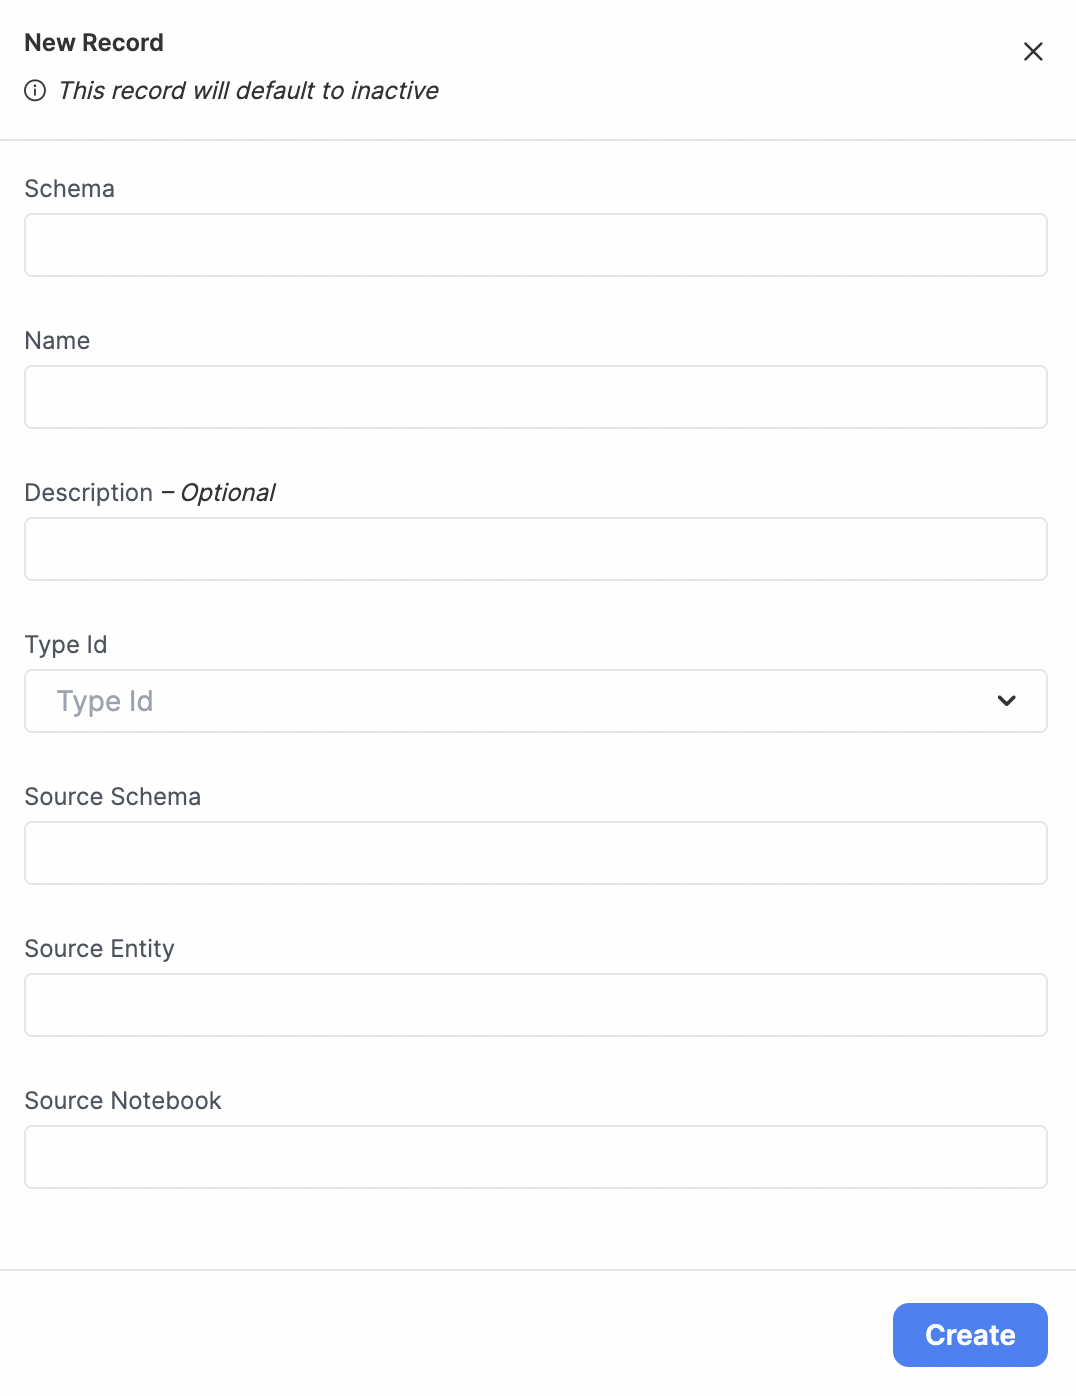
The Entity creation modal.
Entities Default to InactiveAfter creating a new entity, you will have to toggle it on for it to be built during the model building phase. All entities default to inactive state upon creation.
After filling out fields, clicking "Create" will result in a new entry in this table. Create an entry for each of your staging notebooks/entities in your model.
Activate your Entity!Make sure to toggle the Entity ACTIVE in order to start using it. Inactive Entities will not be built by the Empower system.
Entity Modification
You can modify many of the fields for an entity by clicking into the cell you wish to edit. Press the ENTER key on your keyboard or click away from the cell to save your changes.
Entity Deletion
You can multiselect entities from this table, then click "Delete" in the lower left corner of the screen to delete these entities.
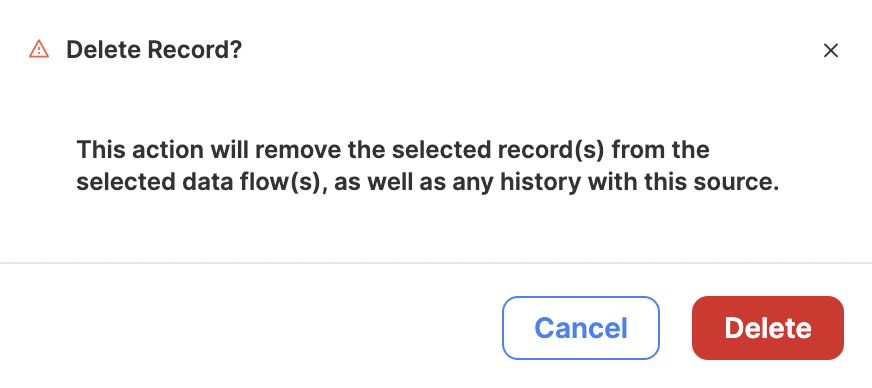
You must confirm that you recognize the results of this action before proceeding.
Entity Types
Entities can be several types, depending on their use and what kind of historical tracking is needed.
| Type Name | Description |
|---|---|
| Type One (Dimension) | New versions of existing data points will overwrite the existing data points. Table is built as a full load (not incrementally). |
| Type Two (Dimension) | New versions of existing data points will be inserted as new data points and flagged as the current version. Table is built as a full load (not incrementally). |
| Fact Full | A generic fact table. Table is built as a full load (not incrementally). |
| Type One Incremental (Dimension) | New versions of existing data points will overwrite the existing data points. Table is built incrementally. |
| Type Two Incremental (Dimension) | New versions of existing data points will be inserted as new data points and flagged as the current version. Table is built incrementally. |
| Fact Incremental | A generic fact table. Table is built incrementally. |
When building a model, it's essential to understand the difference between full and incremental load types. This section provides an overview of these two types and their use cases.
Full Loads
A Full Load involves loading all the data from the source to the destination each time the data is processed. In other words, the entire dataset is reloaded, regardless of whether the data has changed or not. This method can be a good choice when:
- The dataset is small, and the time required to process and reload the entire dataset is relatively short.
- The source data does not have a way to track changes or does not support incremental loads. **
- The latency will be roughly equal in both full and incremental, up to the processing time. Incremental will be more "real-time" in most cases.
However, Full Loads can be time-consuming and resource-intensive, especially when dealing with large datasets or frequent updates.
Incremental Loads
Incremental Load, on the other hand, only processes and loads new or modified data since the last load. This method is more efficient, as it reduces the amount of data being transferred and processed. It can be a good choice when:
- The dataset is large, and processing the entire dataset takes a long time.
- The source data has a method to track changes, such as a modified date or timestamp. **
- The data warehouse or destination can tolerate some delay in reflecting the latest changes.
Incremental Loads may require additional logic and setup to identify and process only the new or modified data. They may also require monitoring and handling of potential data conflicts or issues that may arise when merging the new data with the existing data.
Entity Columns
What are entity columns?Entity columns allow Empower to track and maintain detailed metadata about entities.
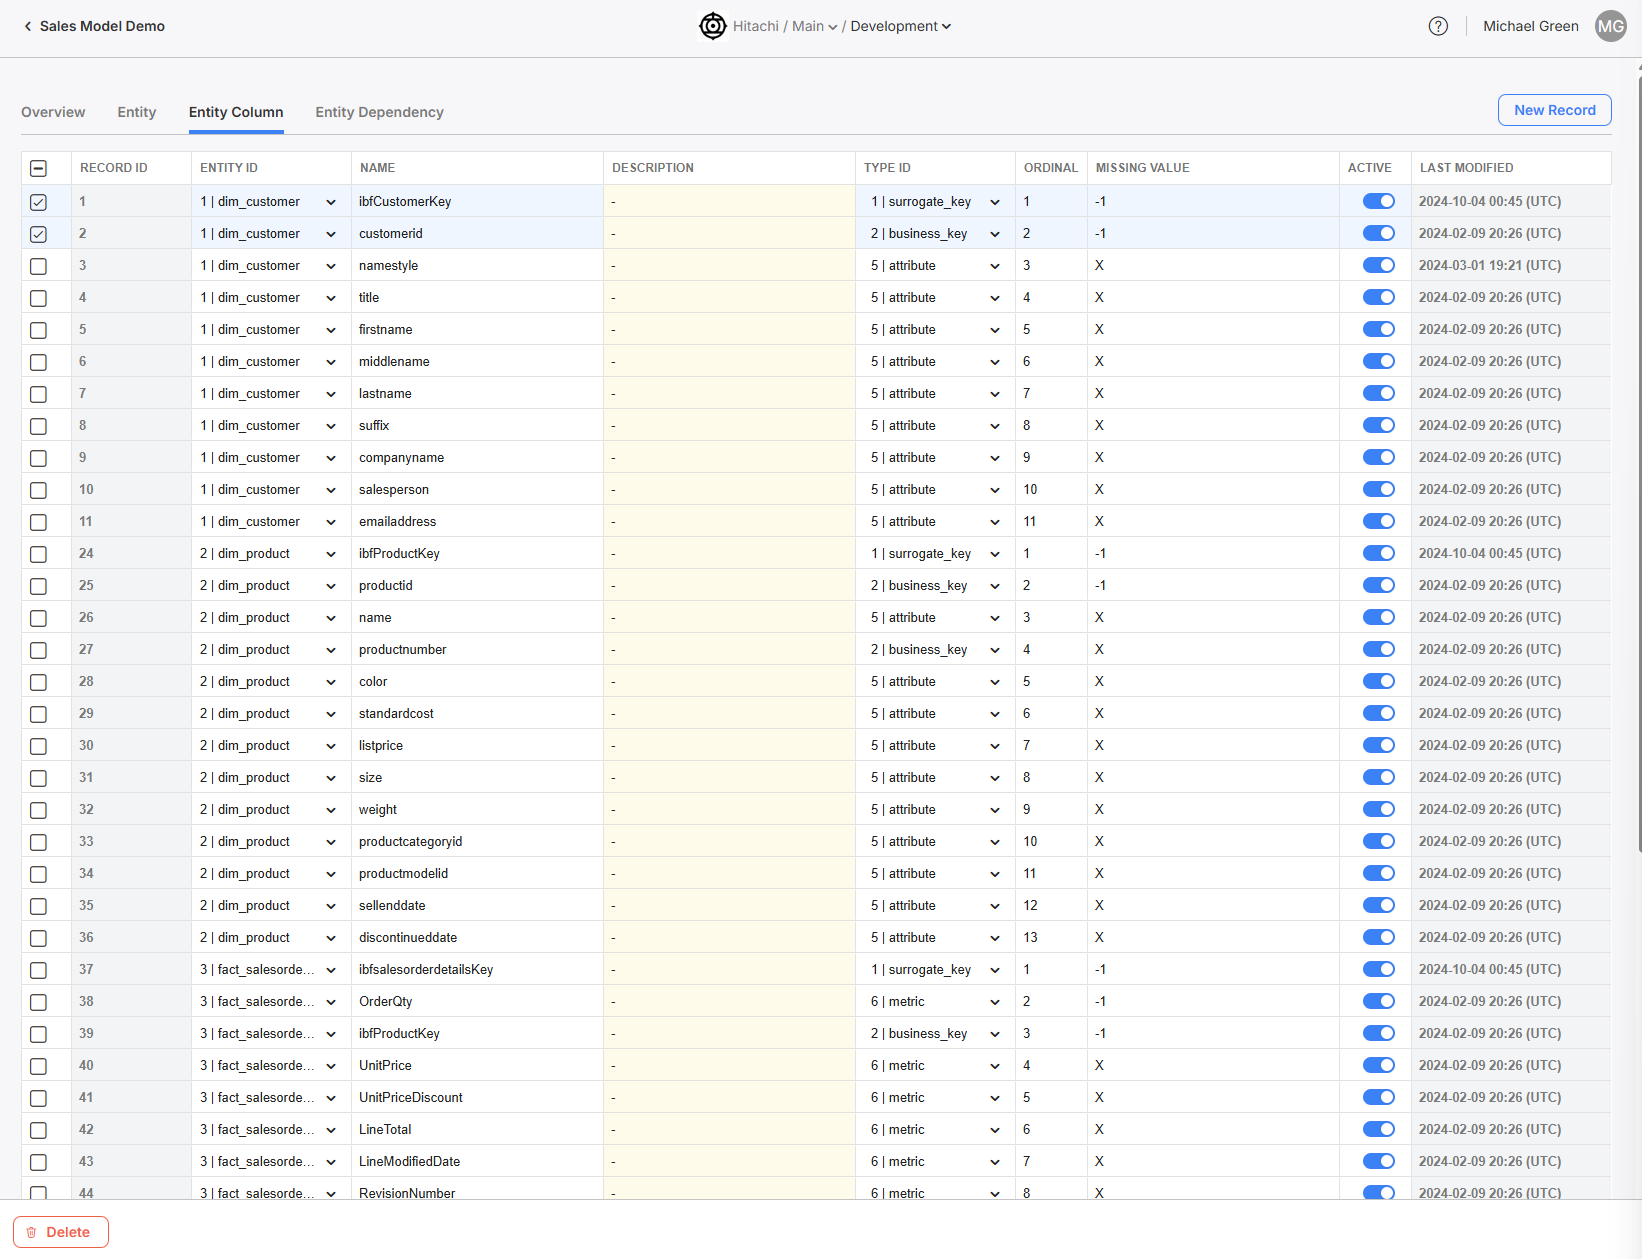
The Entity Column table, where you can view all entity columns across all entities within this model.
Entity columns should be a 1:1 mapping with the fields of all gold-layer dims and facts. All entity columns must be linked to an existing Entity.
Below is a table describing each of the fields in an Entity Column record.
| Column Name | Description | Example Value |
|---|---|---|
| Record ID | The unique generated ID for this entity (autogenerated). | 1 |
| Entity ID | The entity this entity column is associated with. Must be an existing entity in the Entities table. | dim_product |
| Name | The name for this entity column. | productId |
| Description | A short description of this entity column and what it is for. | the ID of the product |
| Type ID | The type for this entity column. Must be one of several types explained below. | surrogate_key |
| Ordinal | The order in which this column should be placed relative to othrs. | 1 |
| Missing Value | This field specifies the value used to create a ghost record See below to learn more about how missing values and ghost records work in Empower. | -1 |
| Active | A toggle to activate/inactivate this entity column | TRUE |
Missing Values and Ghost RecordsEmpower uses ghost records to gracefully handle missing values in entity columns. In a Kimball data warehouse model, a ghost record (also known as a "dummy record" or "default record") is used to handle scenarios where there are missing or unknown values in a dimension table.
Ghost records are particularly useful in scenarios where:
- Data comes from multiple sources, and some sources might have incomplete or inconsistent data.
- The data quality is not guaranteed, and there might be missing or unknown dimension values.
- The business requires every transaction to be accounted for, even if some attributes are unknown.
By implementing ghost records, you can create a more resilient and user-friendly data warehouse that can handle real-world data imperfections gracefully.
Adding Entity Columns
If you followed the steps above, you've let Empower know which Entities are part of your Model. Now, we need to add which columns are associated with each Entity.
There are two ways you can do this.
- Manual Creation: You can individually add each column and type in the needed metadata for it.
- Automatic Syncing of Entity Metadata*(Recommended)* : After creating an Entity, you can use this feature to have Empower automatically pull in and populate the columns and their metadata for you.
Read more below on how you can use each of these methods.
Automatic Syncing of Entity Metadata
You must run the staging table before using the auto entity metadata sync functionality. Data does not need to populated in the table, but the table must first exist for the sync to work.
After creating an Entity, it will be added to the Entity list table where you can select it's associated checkbox. After selecting the checkbox(es) of the Entity, or Entities, you want to pull the column metadata for, you will see a button appear at the bottom of the screen to "Sync Entity Metadata".
Clicking on the button will display a message box asking you to confirm. Once confirmed, the sync will start and you will notice that the Entity Column is temporarily disabled while the metadata is being updated.
Once the sync is complete, the progress spinner on the button will stop and you will be able to select the Entity Column tab again to review your newly refreshed columns.
Manual Entity Column Creation
Create a new Entity Column record by clicking "New Record". This will bring up the Entity Column creation modal.

The creation modal for Entity Column.
After filling out fields, hitting the create button will result in the creation of a new Entity Column.
Ordinal ColumnThe ordinal setting is only taken into account during the first model build. Any subsequent build will assume the order within the existing table. In other words, if Ordinal settings are changed after the first time the model is successfully built, these changes will not be respected.
Activate your Entity Column!Make sure to toggle the Entity Column ACTIVE in order to start using it. Inactive Entity Columns will not be built by the Empower system.
Type ID
Selecting the correct Type ID for your column is as simple as selecting from a drop down list. Please refer to the following table to understand how assignments should be made.
| ID | Name | Definition | Example Value |
|---|---|---|---|
| 1 | surrogate_key | A unique identifier for each row in a table, often generated automatically by the system, which has no business meaning. | A primary key that is a system-generated number, such as an auto-incrementing integer in MySQL or a sequence in PostgreSQL. |
| 2 | business_key | In Empower, the business key is used to ensure the uniqueness of records within a table. It acts as an identifier for merging data and performing key lookups. | For a Customer table, the customer's email address, customer ID, or social security number can be a business key. |
| 3 | foreign_key | A key used to establish a relationship between two tables by referencing the primary key in another table. | In an Order table, a foreign key might be Customer_ID, which links to the primary key of the Customer table. |
| 4 | metadata | Data that provides information about other data, such as descriptions, data types, and relationships between entities. | A description of a database table, such as the column names, data types, and constraints, is an example of metadata. |
| 5 | attribute | A characteristic or property of an entity within a table, represented as a column. | In a Product table, 'product_name', 'price', and 'stock_quantity' are examples of attributes. |
| 6 | metric | A quantifiable measurement, often used for analytical purposes to track performance and trends. | In a Sales table, total revenue, average order value, and the number of items sold can be considered metrics. |
Entity Dependencies
What is an Entity Dependency?Entity Dependencies help Empower define the order in which dims and facts get built and how they can be optimally parallelized. An accurate dependency assignment can be the difference between a fast and efficient model build and a slow or failing process.
Make sure to study your staging logic to determine what entities depend on each other.
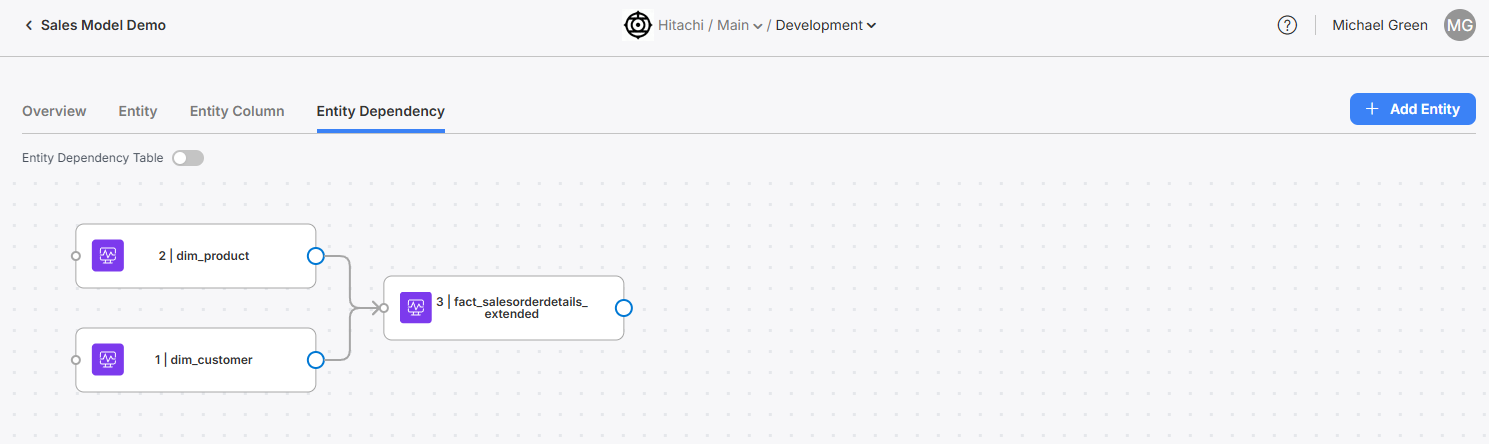
The Entity Dependency tab, where you can see a visualized graph of dependency relationships for this model.
Use entities to build the dependent relationships for entities in your model.
Entity Depenency Creation
Create a new graph node by clicking "New Record". This will bring up the node creation modal, where you can select from a list of the models entities to add as a node. Note: you cannot add the same entity more than once to a graph!
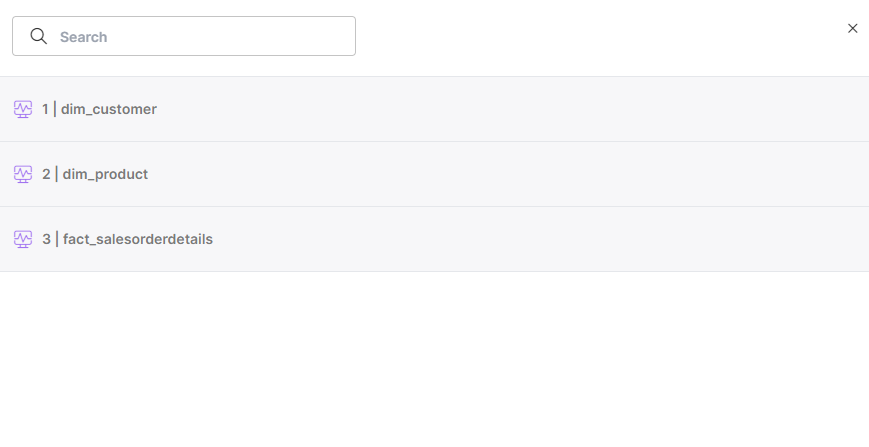
The Entity Dependency node creation modal.
Assign entity relationships for your model entities. In such relationships, children nodes are dependent on their parent nodes, and it must wait for the completion of all of their parents before being built themselves. Make sure to assign parent and child nodes correctly.
An entity must be present on the graph to be built!An entity must be present on the graph to be built, even if it has no dependency relationships. If an entity is not present on your dependency graph, it will not be built during model buildout.
You can create nodes for entities that do not have any dependency relationships. To do this: simply make a new node on the graph for that entity and don't assign any relationships.
Entity Dependency Table View
Toggle the table view for Entity Dependency using the Entity Dependency Table toggle.
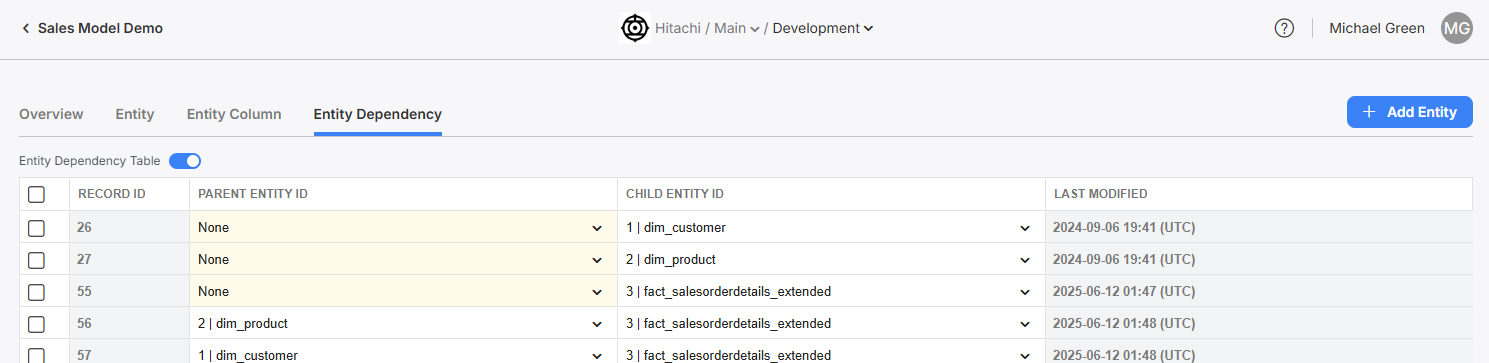
This view shows the table of the directed graph.
Updated 6 months ago