FileDrop for Data Driven Upgrade
This guide is for DDU - Filedrop onlyPlease see the Data-Driven Upgrade Docs for more technical details and developer-level specifications of the DDU packages.
Overview
Data-Driven Upgrade (DDU) using Filedrop is the process of uploading file/files into Databricks File System (DBFS). Customers typically load data into CSV/Excel templates, which are then uploaded into their Empower deployment and then written directly to Dynamics CE and FO tables using a simply defined object-file mapping file as a guide.
Below is a simple process guide for DDU via Filedrop:
Prerequisites
Empower Deployment Prerequisites
All details around deployment Empower are described in the Prerequisites and Empower Deployment page. Please work with an Empower specialist if you have any questions about this process.
DDU-specific Prerequisites
Obtain Credentials via Azure AD Application
The recommended strategy to authenticate to the Dynamics environment is to use an Azure AD application. The Azure Tenant ID, Application ID, and Client Secret are required for creating a connection string.
Tip: This works for both CE and FOThe same Azure application can be used to authenticate to both F&O and CRM environments if within the same tenant.
The application needs to have API permissions for Dynamics ERP. From the Azure Portal that hosts your AD application:
- "API Permissions" > "Add" > "Delegated Permissions"
- "Required Permissions" > "Add"
- Under "Select an API" choose "Dynamics ERP"
- Finally, choose "Delegated Permissions for OAuthGrantType = CODE"
Obtain Databricks Workspace Access
Ensure that you have access to the Empower-deployed Databricks Workspace, which comes standard to any Empower deployment. Work with the dedicated Empower engineer to gain access during the Empower deployment phase.
DDU Process
Step 1: Prepare Data
Prepare your data by using the tried-and-true Excel/CSV template process already part of the DMF migration path today. Make sure you do all your data mapping before finalizing it into the tabular template, as it will not be transformed further using the Empower DDU via Filedrop migration path.
Step 2: Write Object-Mapping File
A JSON file configuration can be uploaded along with the excel data template files. A JSON file is a way to store information in a structured, easy-to-understand format. In our case, we have a JSON file that helps us map files (like Excel templates) to destination entities in Dynamics.
We can store some rules for each file/entity mapping, like whether we should replace existing data in Dynamics 365 or if we should transfer everything in one go. We also can specify which legal entity in Dynamics 365 the data should go to.
Here's an example mapping JSON file:
{
  "entity_one.xlsx": {
    "target_entity": "dynamics_entity_one",
    "legal_entity": "",
    "mode": "append",
    "key_columns": "",
    "batch_size": 15,
    "overwrite": false,
    "atomic": true,
  },
  "entity_two.xlsx": {
    "target_entity": "dynamics_entity_two",
    "legal_entity": "legal_entity_1",
    "mode": "append",
    "key_columns": "",
    "batch_size": 15,
    "overwrite": true,
    "atomic": false,
  },
  "test_01.xlsx": {
     "target_entity": "test_01",
     "legal_entity": "US01",
     "mode": "upsert",
     "key_columns": "employeeid,empnumber",
     "batch_size": 15,
     "overwrite": true,
     "atomic": false
    }
}
Think of it like a recipe book, where the JSON file is the book itself, and each object (like entity_one.xlsx) is a recipe.
- The file name, such as
entity_one.xlsx, represents the name of a file we want to send to Dynamics 365. - The
target_entityis the specific place in Dynamics 365 where the data should go. Defaults to the root name of the file. - The
overwriterule tells us if we should replace the existing data in that place with new data (whentrue) or just append new data without replacing anything (whenfalse). - The
atomicrule designates whether we should transfer all the data at once (whentrue) or piece by piece (whenfalse). - The
legal_entityis a required parameter if target entity has legal_entity column otherwise this is an optional field. - The
moderepresents either you want to append or upsert the records in the target entity. This an optional field, default behavior is append - The
key_columnsparameter is a comma delimited list of fields that represent primary key of the table. This is mandatory field if the mode = 'upsert', otherwise this is an optional field. - The
batch_sizeThis is an optional field and represents number of records to be processed in a single batch. If not specified, batch_size is evenly distributed amongst worker threads.
The "Atomic" ParameterThis creates a "succeed and fail together" behavior in your entity. In other words, if any part of the write fails, all of the entity write fails.
Your Dynamics modification for that specific entity would not occur unless the entire entity writes successfully.
Step 3: Upload Data
You can upload your template files using two different methods. For simple loads, use the Databricks Workspace UI, as it is intuitive to use. For much larger loads (100+ files within a single upload session), we recommend using the Databricks CLI Tool, which can quickly move a directory into DBFS with a single command.
Via DBFS UI
The first is to use the DBFS upload utility from the Databricks UI. Currently this is found by: "New" at the top left of the workspace -> "File Upload" -> "Upload to DBFS". Specify the dropbox location in the text box, then drag and drop the files.
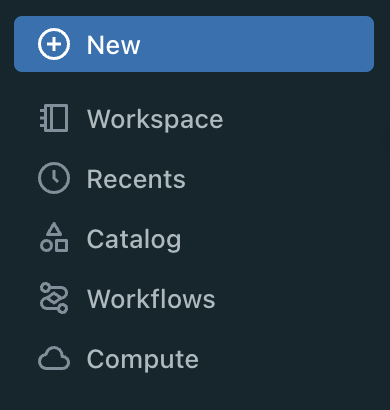
Select "New" on the top of the left navigation pane
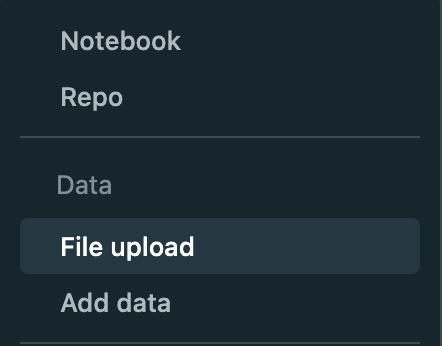
Select "File upload" from the menu
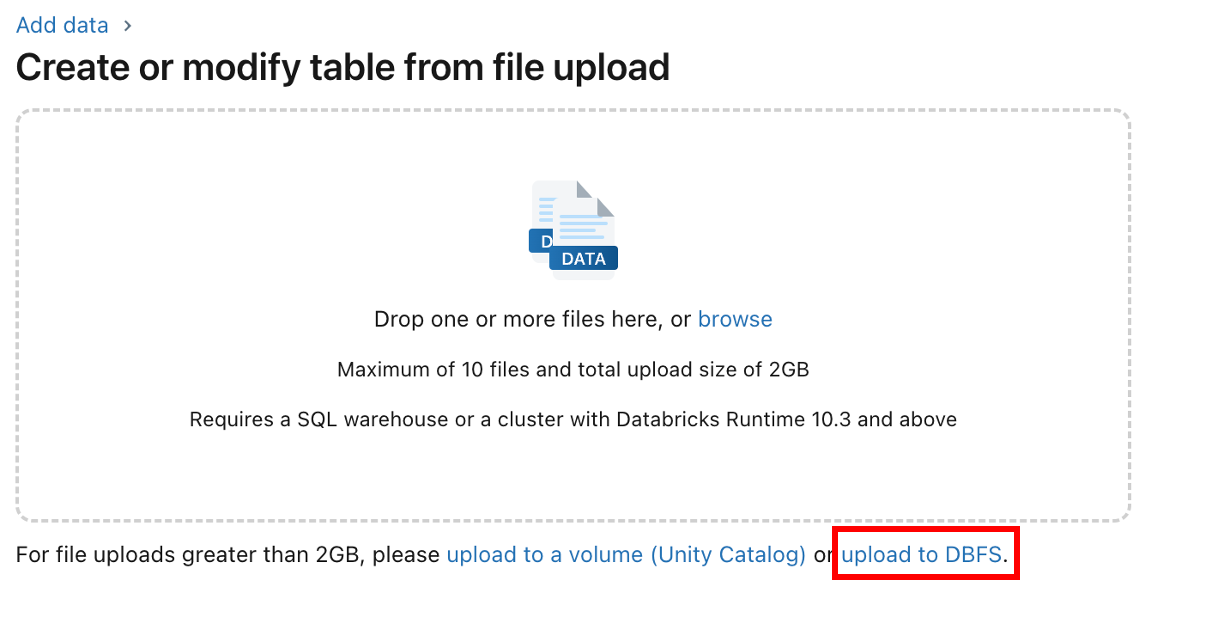
Select "upload to DBFS" from the next screen
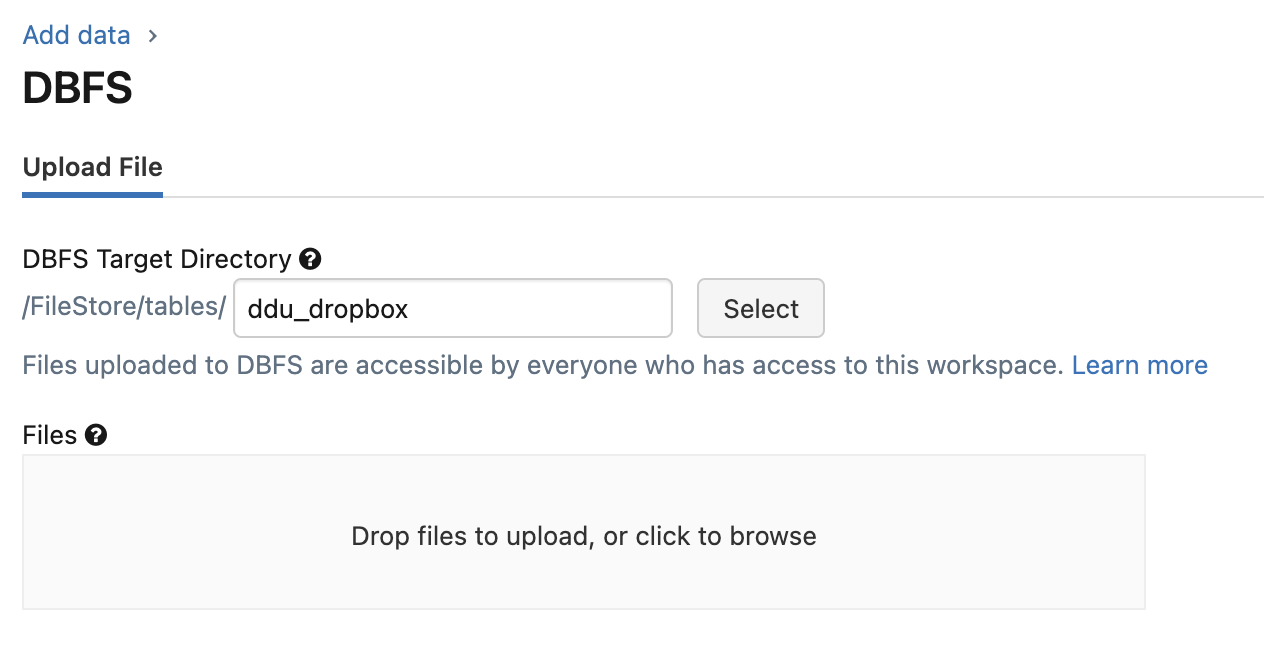
Choose your desired location in file storage using an intuitive name, like "ddu_dropbox" for example.
Follow the instructions to upload files or select from file browser as directed. Make sure to remember the file location ("ddu_dropbox" in this example) for the upload workflow in Step 4.
Via Databricks CLI Tool
The Databricks CLI Tool is a python package that can be installed with pip. The CLI can be used to upload files to the dropbox location on DBFS directly from any machine with Databricks workspace authentication. See the Databricks CLI documentation for more information on this process.
Don't forget your mapping file!If you built one, do not forget to upload your mapping file alongside your template files!
Step 4: Run DDU Workflow
Databricks Workflows allow you to build repeatable, modular notebook execution. Please read the official Introduction to Databricks Workflows documentation for more details on Workflows. Navigate to the Databricks Workflows page by selecting "Workflows" in the left navigation pane.
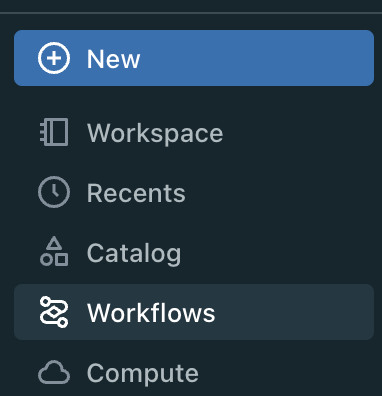
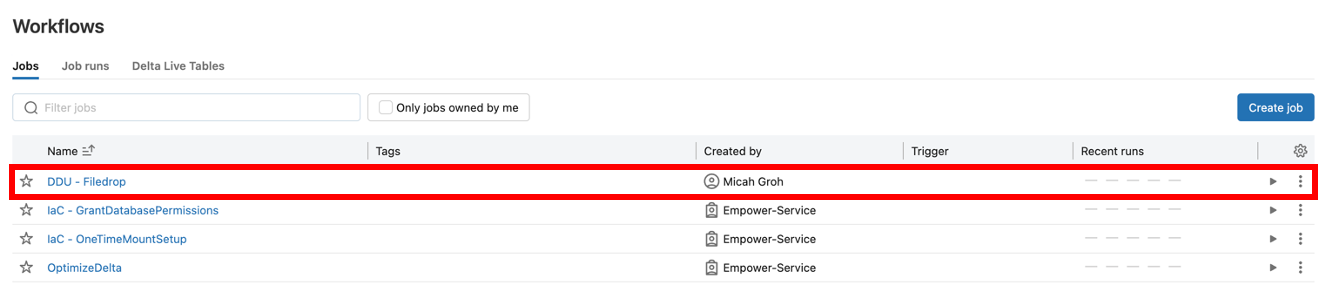
Select the DDU - Filedrop workflow, which should come pre-deployed in your Databricks workspace.

Navigate to the workflow tasks using the "Tasks" tab.

The 3-default steps in the DDU - Filedrop workflow: the tasks and their respective notebooks.
The DDU - Filedrop workflow is already within your environment. The DDU - Filedrop workflow contains 3 core tasks which are completed serially during the workflow's run:
- Init: Initializes critical DDU functions, like the logging table. Takes DDU variables as input such as the location of the file dropbox in DBFS.
- Ingest: Runs through every file in the dropbox folder and ingests it into the Data Lake. Maps the ingested files into respective tables using the mapping configuration file as a guide.
- Migrate: Publishes tables out to the Dynamics 365 deployment (CE or FO) using the mapping configuration file as a guide to determine which tables are pushed to which entities and other settings.
The whole DDU - Filedrop workflow is idempotent, meaning that each time the workflow is run, only data that has not been ingested yet will be migrated. This is ensured by counting the number of records already migrated, checking the validation output, and the checkpointing location from the auto-loader. This means you wont need to drop any tables in the Data Lake in between runs to avoid duplications in Dynamics.
Click on the dropdown arrow next to the RUN button, then click on run with different parameters to see a list of all the workflow parameters and their default values. You may manipulate these values to produce different behaviors for the workflow.

Workflow Parameters
Below is a list of all the parameters you would find in the Run now with different parameters popup menu.
| Name | Description | Default Value |
|---|---|---|
| database | the name of the database in the data lakehouse | ddu_dropbox_demo |
| state_table | the name of the table which keeps track of the migration tables | state |
| log_table | the name of the log table within the database where all logs will be written | batch_log |
| drop_database | a boolean for setting whether the entire database should be dropped at the beginning of this workflow run | FALSE |
| dropbox_folder | the location in DBFS where the file templates are uploaded | bfs:/Filestore/tables/ddu_dropbox |
| config_name | the name of the migration's configuration mapping file. This is expected to be within the folder defined by "dropbox_folder" | ddu_config.json |
| migration_root | the root location of the raw tables as they are ingested from the dropbox folder | dbfs:/mnt/RAW/ddu/demo/dropb |
| download_quarantine | a boolean value of whether or not to automatically download the quarantine table to the migration root location in DBFS after this run | FALSE |
| quarantine_db | the name of the table which keeps track of all failed batches | ddu_quarantine |
| reset_checkpionts | a boolean value to reset any checkpoints made from any previous run | FALSE |
| secret | the name of the keyvault secret within the Empower keyvault that contains the connection string to the Dynamics environment | empowerdynamics-jdbc-oauth-fno-isd |
The "Secret" ParameterThis parameter refers to the name of the secret in your Azure Keyvault (within the same tenant as Empower) which contains the connection string for your Dynamics environment.
For examples of what FO and CE connection strings look like, please see the DDU Getting Started guide's section titled "Connection Strings".
Step 5: Identify Errors and Rerun
Log Table
The log table (default location batch_log) contains all logged ingest and upload actions for a given run. Those with SQL experience can quickly identify records by querying the log table as defined in the Init task of Step 4. To query this table, from any notebook in Databricks, run the following command (assuming default values):
SELECT * FROM [catalog].ddu.batch_logPowerBI Report
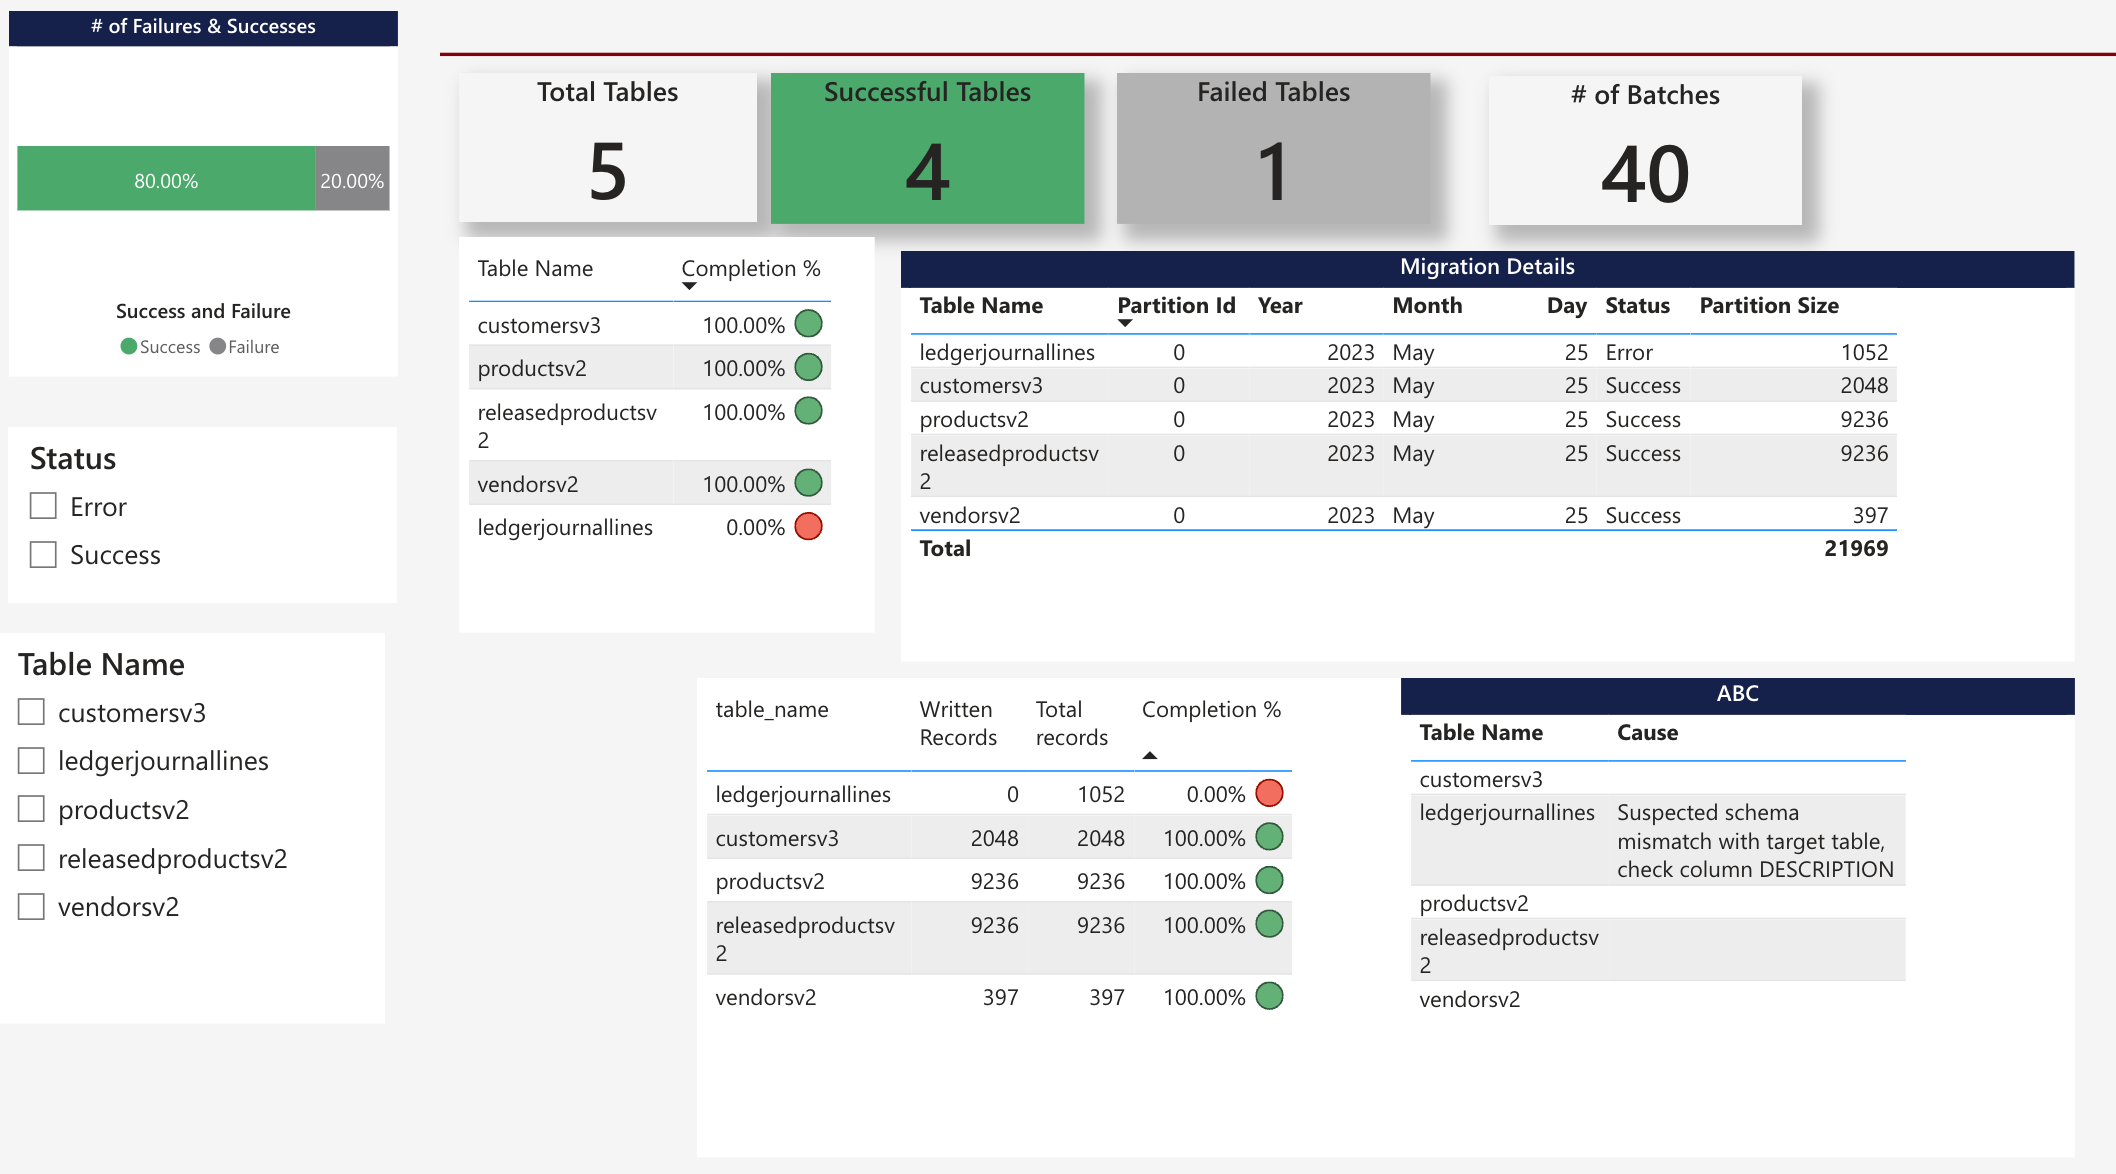
We also deploy a PowerBI report that can keep track of the log table. Please speak with your delivery manager for how to access this report in your workspace.
Quarantine Table
The quarantine table (default location at ddu_quarantine) keeps track of failed batches of data during the publish phase.
Quarantined BatchesAt the end of a run, the default DDU settings will download the entire quarantine table in the form of a CSV file to DBFS. From there, you can download it to your local machine, fix the items in question, then reupload via Step 1 and restart the process.
With default settings, quarantine file will be located under the ddu_artifacts/ folder in DBFS.
You may query the quarantine table at any time by running the following SQL statement (assuming default values):
SELECT * FROM [catalog].ddu.ddu_quarantineFAQ
Q: What is DDU using Filedrop?
A: Data-Driven Upgrade (DDU) using Filedrop is the process of uploading file/files into Databricks File System (DBFS). Customers typically load data into CSV/Excel templates, which are then uploaded into their Empower deployment and then written directly to Dynamics CE and FO tables using a simply defined object-file mapping file as a guide.
Q: What are the prerequisites for DDU?
A: The prerequisites for DDU include
- Empower Deployment: All details around deployment Empower are described in the Prerequisites and Empower Deployment page.
- Obtain Credentials via Azure AD Application: The recommended strategy to authenticate to the Dynamics environment is to use an Azure AD application.
- Obtain Databricks Workspace Access: Ensure that you have access to the Empower-deployed Databricks Workspace.
Q: How to upload data in the DDU process?
A: You can upload your template files using two different methods. For simple loads, use the Databricks Workspace UI. For much larger loads (100+ files within a single upload session), we recommend using the Databricks CLI Tool.
Q: What is the purpose of the object-mapping file in the DDU process?
A: A JSON file configuration can be uploaded along with the excel data template files. This helps us map files (like Excel templates) to destination entities in Dynamics.
Q: How to run the DDU Workflow?
A: Databricks Workflows allow you to build repeatable, modular notebook execution. The DDU - Filedrop workflow contains 3 core tasks which are completed serially during the workflow's run: Init, Ingest, and Migrate.
Q: How to identify errors in the DDU process?
A: Errors in the DDU process can be identified by querying the log table as defined in the Init task of Step 4. You can also track the log table using a PowerBI report that comes with the deployment.
Q: Can the DDU process be repeated?
A: Yes, the DDU - Filedrop workflow is idempotent, meaning that each time the workflow is run, only data that has not been ingested yet will be migrated.
Updated 5 months ago